
To wield the Deathgivers in Albion is to understand that victory and defeat are two sides of the same sharpened coin. These are not tools for a prolonged, honorable duel; they are instruments of execution. In the misty, haunted corners of the Outlands, where the undead roam and the very air smells of iron and decay, the Deathgivers feel right at home. They are the Weapon of choice for the player who finds a dark beauty in efficiency—who believes that the only hitpoint that matters is the last one.
This build guide will walk you through the Best Deathgivers Builds that dominates solo and small-scale content, from the Mists to Corrupted Dungeons.
PvP Build and Abilities Selection
Every piece of gear in this build is chosen for a singular purpose: to amplify your burst damage while providing the defensive tools to survive your own audacity.


Weapon Abilities & Passive Selection
Your chosen abilities define your playstyle. For the Deathgivers, we focus on a fluid, in-and-out combo centered on the Ghost Strike.
- Q-Slot:

Sunder Armor– This is your setup tool. It’s a melee-range ability that deals damage and, crucially, applies a stack of Sunder Armor on your target, lowering their damage resistances. You must apply three stacks to enable your primary combo. - W-Slot:

Shadow Edge– This is your strategic choice.Shadow Edgeis a high-skill, long-range skillshot that stuns your target and pulls you to them, making you immune to crowd control on the way. It’s perfect for initiating on a key target from a distance. - E-Slot:

Ghost Strike– The heart of the Deathgivers‘ identity. This ability causes you to charge through an enemy, dealing massive magical damage, turning you invisible, and reducing your energy costs. Its most devastating feature is the cooldown reset: if the target has three stacks of Sunder Armor or you have three stacks of Assassin Spirit,Ghost Strikedoes not go on cooldown, allowing you to use it twice in quick succession. - Passive:
Aggressive Rush– The ideal passive for this burst-oriented build. Every four auto-attacks, it increases your damage by 6% for 3 seconds. This synergizes perfectly with your playstyle, giving you a welcome damage boost right as you are executing your combo.

Rotation:
This sequence is your blueprint for a successful assassination. The following table breaks down the optimal order of operations.
| Step | Action | Goal |
|---|---|---|
| 1. Engage | Use W-Slot  Shadow Edge or  Swift Cut to close the gap. | Initiate the fight on your terms. |
| 2. Stack & Buff | Weave Q-Slot  Sunder Armor and auto-attacks. | Apply 3 Sunder stacks & build Aggressive Rush. |
| 2. Armor Buff | Activate armor skill  Bloodlust | to heal yourself and fill your helth bar. |
| 4. Execute | Use E-Slot  Ghost Strike 2 times to finish | Deal massive damage and turn invisible. |
| 6. Reset & Finish | Use Duskweaver Helmet‘ ability  Spider's Thread if enemy try to run. | Confirm the kill on the now-weakened target. |
PvE & Dungeon Build and Abilities Selection
Every piece of gear is chosen to maximize your Area of Effect (AoE) damage, sustain, and mobility to clear dungeons with brutal efficiency.
| Item Slot | Recommended Item | Skill Selection | PvE Rationale |
|---|---|---|---|
| Head |  Specter Hood |  Flash of Insight | Essential survivability, making you use Bloodlust 2 times without cooldown. |
| Armor | 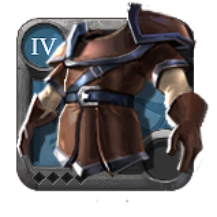 Mercenary Jacket | Bloodlust | Heals you on each direct hits, crucial for sustain |
| Boots | 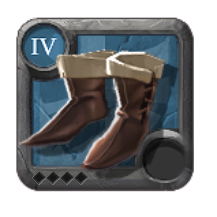 any Leather shoes |  Refreshing Sprint for cooldown | Key mobility for engaging, cooldown reduction, and repositioning. |
| Cape | 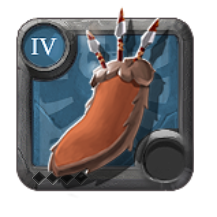 Keeper Cape | – | Massive 50% damage boost when health drops, perfect for risky big pulls. |
| Food | 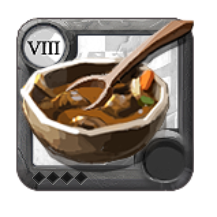 Beef Stew | – | Consistent, always-active damage increase for faster clear times. |
| Potion | 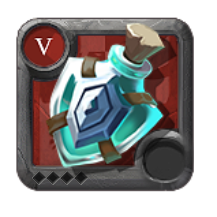 Resistance Potion | – | On-demand survivability for boss fights or dangerous elite mobs. |
PvE Weapon Abilities & Passive Selection
Your ability choices change dramatically to handle multiple targets.
- Q-Slot:
Deadly Swipe– This is your primary AoE clear tool and a direct replacement for Sunder Armor in PvE.hitting all enemies in 3m area. This is your main source of damage against mobs. - W-Slot:
Chain Slash– This ability is non-negotiable for PvE. It makes you invisible and immune as you dash through up to four enemies, dealing increasing damage with each hit. It is your primary engagement tool, your main mobility to traverse packs, and a significant source of burst damage. - E-Slot:
Ghost Strike– While still your signature move, its use case shifts. It becomes your elite and boss killer. You use it not for the reset (which is harder to achieve withoutSunder Armor), but for its massive single-target damage and the brief moment of invulnerability/invisibility as you pass through the target, allowing you to dodge a big attack. - Passive:
Deep Cuts– Remains the best-in-slot passive. As you constantly auto-attack between ability casts, Every 4 Auto-Attacks, inflict a bleed on the target



The PvE Rotation
Your goal in PvE is to group enemies and unleash your AoE combo. The rotation is more of a fluid priority system than a rigid sequence.
- The Pull & Engage: Gather a pack of monsters. Immediately use

Chain Slash(W) to charge through the entire group. You will deal high damage to all of them while being immune. - The Core AoE Combo: Activate your Mercenary Jacket‘s

Bloodlust
Deadly Swipe(Q). Hold the channel to shred the entire pack. - Elite/Boss Execution: For tougher single targets like dungeon bosses or elite mobs, use
Ghost Strike(E). Dash through them for a huge chunk of their health. then use your shoes skill Refreshing Sprintto reduce all your abilities cooldown. - healing the second time: you can use your Specter Hood skill
Flash of Insightto reset Bloodlust
Final Thoughts
The Deathgivers offer a steep learning curve with an immense payoff. It suits players who prefer precision over attrition, who take pride in a perfectly timed engage more than a slow victory.