
In the vast, lawless expanse of Null Security space, fleet compositions are the ultimate expression of an alliance’s power and strategic coordination. Unlike high-sec Mission Running, where a single pilot can rely on raw stats, Null Sec warfare is a high stakes game of rock paper scissors played with hundreds of pilots. Achieving S-Tier status in this environment requires more than just expensive hulls; it demands a doctrine, a meticulously curated selection of ships designed to work in perfect synergy to exploit enemy weaknesses in range, speed, or electronic warfare.
This guide outlines the best Fleet Ship Compositions for Null-Sec, with the ideal build for each ship within the fleet.
Paladin and Vargur
The Paladin and Vargur are two of the most powerful sub-capital ships in EVE Online, often serving as the backbone for high end PVE and specialized Null Sec fleet doctrines. While both utilize the Bastion Module to transform into nearly invulnerable fortresses with massive damage and electronic warfare resistance, they differ significantly in weapon systems, engagement styles, and optimal environments.
High-End Null Sec Fleet Fit
The Paladin (Amarr Marauder)
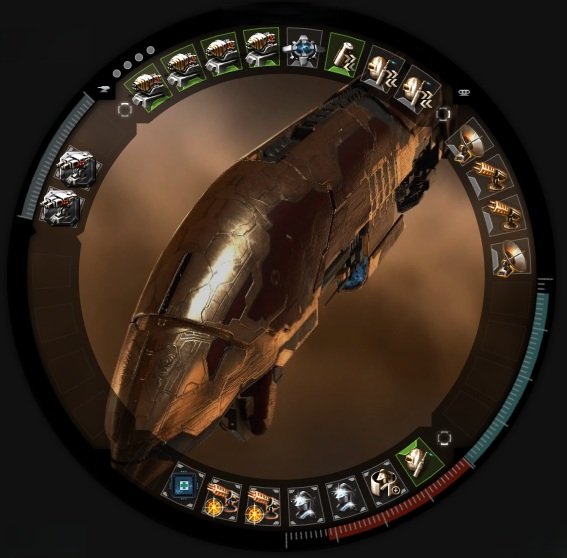
This Paladin Fit delivers explosive damage, relying on a powerful active armor tank to outlast the incoming damage. This is a common and effective fit for incursion running, particularly in Vanguard sites .
| Slot | Specific Recommendation & Reasoning |
|---|---|
| High (8) | 4x  Mega Pulse Laser II Mega Pulse Laser II |
1x  Bastion Module I Bastion Module I | |
2x  Large Remote Armor Repairer II, 1x Large Remote Armor Repairer II, 1x  Imperial Navy Large Remote Capacitor Transmitter Imperial Navy Large Remote Capacitor Transmitter | |
| Mid (4) | 2x  Tracking Computer II (Tracking Speed Scripts) Tracking Computer II (Tracking Speed Scripts) |
2x  Sensor Booster II (Scan Resolution Scripts for incursions) Sensor Booster II (Scan Resolution Scripts for incursions) | |
| Low (7) | 1x  Corpus X-Type Large Armor Repairer Corpus X-Type Large Armor Repairer |
1x  Imperial Navy 1600mm Steel Plates Imperial Navy 1600mm Steel Plates | |
2x  Imperial Navy Multispectrum Energized Membrane Imperial Navy Multispectrum Energized Membrane | |
2x  Imperial Navy Heat Sink Imperial Navy Heat Sink | |
1x  Damage Control II Damage Control II | |
| Rigs (2) | 2x  Large Energy Burst Aerator II Large Energy Burst Aerator II |
| Drones | 5x  Imperial Navy Acolyte Imperial Navy Acolyte |
The Vargur (Minmatar Marauder)

In fleet, a Vargur’s role shifts from a solo tank everything fortress to a high damage Brawler. Because you have fleet mates for support, your fit should prioritize Damage Application (hitting small, fast targets) and Resistances (to help Logistics ships repair you efficiently).
| Slot | Module Recommendation | Purpose |
|---|---|---|
| High (7) | 4x  800mm Repeating Cannon II 800mm Repeating Cannon II | Maximum close-range DPS and tracking. |
| Bastion Module I | Essential for the 50% EWAR resistance and damage bonus. | |
 Heavy Energy Neutralizer II Heavy Energy Neutralizer II | Drains enemy capacitor to shut down their tackle/tank. | |
 Heavy Energy Nosferatu II Heavy Energy Nosferatu II | Keeps your modules running even if you are being neuted. | |
| Mid (6) | 2x  Republic Fleet Large Cap Battery Republic Fleet Large Cap Battery | increases maximum capacitor capacity and provides resistance to energy warfare. |
 Pith X-Type Shield Boost Amplifier Pith X-Type Shield Boost Amplifier | enhance the performance of active  shield boosters. shield boosters. | |
 Heavy Stasis Grappler II Heavy Stasis Grappler II | Slows down close targets by up to 85% so your guns hit perfectly. | |
| Pith X-Type X-large Shield Booster | massive, rapid shield restoration | |
 Multispectrum Shield Hardener II Multispectrum Shield Hardener II | Increases all resistances for easier Logistics (Logi) repairs. | |
| Low (6) | 2x  Gyrostabilizer II Gyrostabilizer II | Maximum damage and rate of fire. |
4x  Capacitor Flux Coil II Capacitor Flux Coil II | Significantly increase your ship’s capacitor recharge rate | |
| Rigs (2) |  large capacitor control circuit II large capacitor control circuit II | Boost your ship capacitor recharge rate. |
| large powergrid subroutine maximizer II | Reduce the CPU requirements of your Capacitor Flux Coil II | |
| Drones | 10x  Warrior II Warrior II | Unmatched speed and superior tracking capabilities, making them the premier anti-frigate tool |
Rokh
The Rokh is the quintessential Fleet Sniper. While it may be outclassed in solo PvE by hulls like the Paladin, it remains an S-Tier choice for large Null Sec alliance doctrines due to its extreme range and the ability for a fleet of 50+ Rokhs to instantly delete targets before enemy logistics can react.
High End Null Sec Fleet Fit
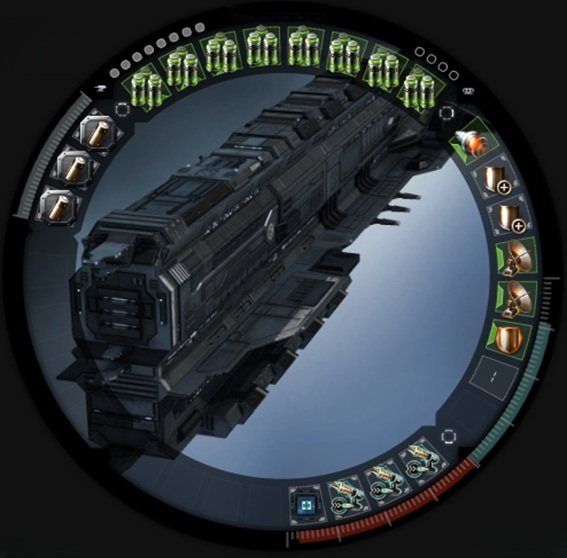
| Slot | Module Recommendation | Purpose |
|---|---|---|
| High (8) | 8x  425mm Railgun II 425mm Railgun II | The “standard” sniper setup; uses  Spike L for max range. Spike L for max range. |
| Mid (7) |  Large Micro Jump Drive (MJD) Large Micro Jump Drive (MJD) | The “get out of jail free” card; jumps you 100km away if you get tackled. |
2x  Large Shield Extender II Large Shield Extender II | Provides the raw “buffer” hitpoints needed to survive initial volleys. | |
| 2x Sensor Booster II | Loaded with Targeting Range Scripts to lock targets at 200km+. | |
| Multispectrum Shield Hardener II | Maximizes the effect of your hull’s resistance bonus. | |
| Low (4) | 3x  Magnetic Field Stabilizer II Magnetic Field Stabilizer II | Direct damage and rate-of-fire increase. |
| Damage Control II | Standard emergency protection for hull and armor. | |
| Rigs (3) | 3x large capacitor control circuit II | Increases your ship capacitor recharge rate. |
Cyclone Fleet Issue (CFI)
The Cyclone Fleet Issue (CFI) has ascended to S-Tier status as the premier skirmish battlecruiser. While the Rokh is a stationary wall of steel, the CFI is a high speed, agile predator that uses its unique signature radius bonus to sig tank incoming damage from larger ships. It has effectively replaced many traditional Heavy Assault Cruiser (HAC) doctrines due to its superior price to performance ratio.
High-End Null Sec Fleet Fit

| Slot | Module Recommendation | Purpose |
|---|---|---|
| High (8) | 6x  Heavy Missile Launcher II Heavy Missile Launcher II | Core DPS; swap between  Fury (max damage) and Fury (max damage) and  Precision (for small targets). Precision (for small targets). |
 Shield Command Burst II Shield Command Burst II | Provides timed defensive bonuses to all fleet members within its area of effect. | |
| Medium Energy Nosferatu II | Saps capacitor from a target ship and adds it to your own | |
| Mid (5) |  50MN Cold-Gas Enduring Microwarpdrive 50MN Cold-Gas Enduring Microwarpdrive | Provides the necessary speed to maintain range and follow the FC. |
| Large Shield Extender II | Provides the raw “buffer” HP required for a fleet doctrine. | |
| 2x Multispectrum Shield Hardener II | Increases overall resistances, making it easier for Scimitars to keep you alive. | |
 Warp scrambler II Warp scrambler II | Loaded with Targeting Range Script to counter the CFI’s naturally short lock range. | |
| Low (5) | 3x  Ballistic Control System II Ballistic Control System II | Maximizes missile damage and rate of fire. |
| Damage Control II | Standard emergency protection for all defensive layers. | |
 Nanofiber Internal Structure II Nanofiber Internal Structure II | Enhances speed and agility, critical for a kiting doctrine. | |
| Rigs | 3x  Medium Core Defense Field Extender II Medium Core Defense Field Extender II | Further increases total shield hitpoints for maximum buffer. |
Leshak
In high end wormhole brawls and Null Sec incursions, the Leshak (Precursor Battleship) is an S-tier choice specifically for its spooling mechanic. Unlike traditional turret ships, its damage increases by 5% every cycle, reaching its maximum potential after approximately 2 minutes of continuous fire on the same target.
High-End Null Sec Fleet Fit
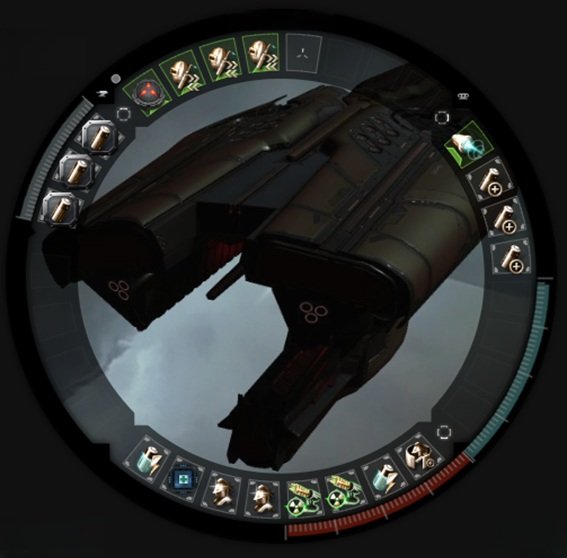
This fit is the standard Spider Tank Build used for heavy armor brawls and structure bashes.
| Slot | Module Recommendation | Purpose |
|---|---|---|
| High (5) |  Supratidal Entropic Disintegrator II Supratidal Entropic Disintegrator II | The spooling main weapon; use  Occult L for max close-range DPS. Occult L for max close-range DPS. |
| 3x Large Remote Armor Repairer II | The “Spider Tank” core; allows you to repair fleet mates. | |
| Mid (4) | 500MN Microwarpdrive II | Positioning and anchoring with the fleet. |
3x  Large Cap Battery II Large Cap Battery II | Increases your ship capacitor recharge rate. | |
| Low (8) |  1600mm Steel Plates II 1600mm Steel Plates II | Massive “buffer” tank to survive until reps land. |
2x  Entropic Radiation Sink II Entropic Radiation Sink II | Increases fire rate and max spool damage. | |
2x  Multispectrum Coating II Multispectrum Coating II | Boosts resistances for more efficient remote repairs. | |
| Damage Control II | Final defensive layer for all HP types. | |
| x2 Capacitor Flux Coil II | Significantly increase your ship’s capacitor recharge rate | |
| Rigs (3) | 3x large capacitor control circuit II | Increases your ship capacitor recharge rate. |
Logistics
The Backbone: Basilisk & Guardian
These ships (Basilisk & Guardian) use a Capacitor Chain (Cap Chain). Two or more Logi ships lock each other and transfer energy back and forth; due to ship bonuses, they create more energy than they use, making them virtually immune to energy neutralizing (neuts) from the enemy.
Basilisk (Shield Logi)

| Slot | Module Recommendation | Purpose |
|---|---|---|
| High | 4x  Large Remote Shield Booster II Large Remote Shield Booster II | High-volume shield repairs for the fleet. |
2x  Large Remote Capacitor Transmitter II Large Remote Capacitor Transmitter II | The “Cap-Chain” core; transfers energy to other fleet member. | |
| Mid | 50MN Microwarpdrive II | Fleet positioning and “anchoring” on the logistics lead. |
| 2x Large Shield Extender II | Provides a heavy “buffer” to survive being targeted (Primaried). | |
| Multispectrum Shield Hardener II | Increases all-around resistances. | |
 EM Shield Hardener II EM Shield Hardener II | Plugs the Basilisk’s natural hole in electromagnetic resistance. | |
| Low | Damage Control II | Critical for extra effective hitpoints (EHP) across all layers. |
 Reactor Control unit II Reactor Control unit II | Ensures the ship stays stable if the cap-chain is briefly interrupted. | |
| Rigs | Medium Core Defense Field Extender II | Increases the total shield buffer. |
| Medium EM Shield Reinforcer II | Increases your EM resistance |
Guardian (Armor Logi)

The Guardian is the gold standard for armor logistics in Null Sec. Like the Basilisk, it relies on a Capacitor Chain to provide near infinite energy for its heavy repair modules. In a fleet, Guardians are prized for their high natural resistances and small signature radius, which makes them harder for battleships to hit compared to their shield counterparts.
| Slot | Module Recommendation | Purpose |
|---|---|---|
| High | 4x Large Remote Armor Repairer II | High output armor healing for fleet members. |
| 2x Large Remote Capacitor Transmitter II | Maintains the “Cap Chain” for infinite energy. | |
| Mid | 1x  10MN Afterburner II 10MN Afterburner II | Keeps signature radius low to mitigate incoming damage. |
| 1x Large Cap Battery II | Protects against enemy energy neutralizers (neuts). | |
| Low | 1x 1600mm Steel Plates II | Provides a heavy “buffer” to survive being focused by the enemy. |
1x  True Sansha EM Armor Hardener True Sansha EM Armor Hardener | Maximizes EM armor resistances. | |
1x  True Sansha Thermal Armor Hardener True Sansha Thermal Armor Hardener | Plugs the natural explosive resistance hole in Amarr hulls. | |
| 1x Damage Control II | Essential final layer of defense for the hull. | |
1x  Multispectrum Energized Membrane II Multispectrum Energized Membrane II | Boosts resistances | |
| Rigs | 2x Medium Ancillary current Router II | Increases the amount of armor repaired per cycle. |
Grid Control: The Sabre
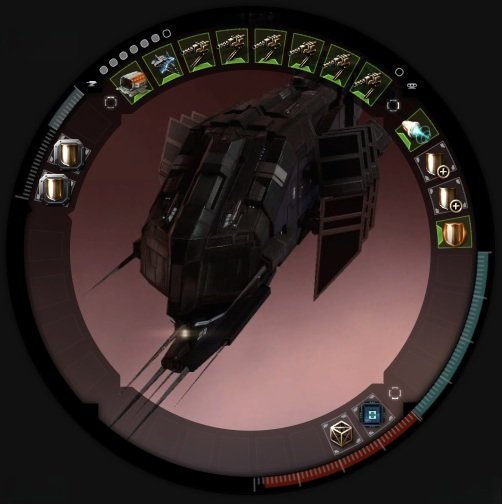
The Sabre is the most popular Interdictor because of its high speed and agility. In Null Sec, a fleet without a Sabre is blind, it cannot stop an enemy from warping away.
| Slot | Module Recommendation | Purpose |
|---|---|---|
| High |  Interdiction Sphere Launcher I Interdiction Sphere Launcher I | The “Bubble Gun”; carries 3 probes (Standard or Web). |
 Prototype Cloaking Device I Prototype Cloaking Device I | Essential for staying safe on grid while waiting for a target. | |
6x  125mm Gatling Autocannon II 125mm Gatling Autocannon II | Low fitting guns to “whore” on killmails or clear drones. | |
| Mid | 5MN Y-T8 Compact Microwarpdrive | Primary propulsion for high-speed bubbling maneuvers. |
| 2x Medium Shield Extender II | (Republic Fleet preferred) Provides the “buffer” to survive. | |
| Multispectrum Shield Hardener II | Increases all-around resistances. | |
| Low | Damage Control II | Critical for overall Effective Hitpoints (EHP). |
| Nanofiber Internal Structure II | Increases speed and improves “Align Time” for fast exits. | |
| Rigs | 2x Small Core Defense Field Extender II | Increases total shield capacity. |
Logistic Disruption: The Sentinel

In Null Sec fleet operations, the Sentinel (Amarr Electronic Attack Frigate) is an S-tier disruption platform designed to dismantle enemy logistics and shut down high value targets from a distance. Its massive bonuses to Energy Neutralizer and Weapon Disruption range make it a Mini Curse that can force an enemy fleet to break their capacitor chain or lose their damage application entirely.
| Slot | Module Recommendation | Purpose |
|---|---|---|
| High | 2x Small Energy Neutralizer II | Drains enemy capacitor from extreme range (up to 40km+). |
| 1x Small Energy Nosferatu II | “Steals” energy to keep your own modules active even if neuted. | |
| Mid | 1MN afterburner II | Essential for maintaining range and kiting. |
1x  Guidance Disruption II Guidance Disruption II | Loaded with Scripts. | |
| Medium Shield Extender II | Provides the “buffer” to survive. | |
| Multispectrum Shield Hardener II | Increases all around resistances. | |
| Low | Damage Control II | Critical for overall Effective Hitpoints (EHP). |
 Power Diagnostic System II Power Diagnostic System II | Provides a wide range of small bonuses to your ship’s engineering subsystems. | |
 Micro Auxiliary Power Core II Micro Auxiliary Power Core II | Provides a flat bonus to your ship’s powergrid. | |
| Rigs |  Small Particle Dispersion Augmentor II Small Particle Dispersion Augmentor II | Increases the strength of your Weapon Disruption modules. |
 Small Egress Port Maximizer II Small Egress Port Maximizer II | Reduces the capacitor cost of your energy neutralizers. |
Final Thoughts
The true S-Tier of any fleet, however, lies in its Support Wing. The synergy between a Basilisk’s cap chain and a Sentinel’s ability to break the enemy’s repairs creates a gap in the battlefield that your mainline damage dealers can exploit. Without the grid control of a Sabre to keep the enemy pinned or the life saving reps of a Guardian, even the most expensive Paladin or Vargur becomes a stationary target. In the lawless expanse of Null Sec, your fit is your blueprint, but your fleet mates are your armor.