Your combat philosophy revolves around controlled aggression and temporal dominance. You are not a mindless berserker; you are a master of timing and pressure, a graduate of the fallen Ginaz School where every motion is calculated and every strike has purpose. The rhythm of your combat follows a simple, brutal pattern: close the distance, stagger your opponent, and execute with precision. Unlike the Trooper who relies on superior firepower or the Mentat who depends on calculated positioning, your power comes from unrelenting pressure and masterful stamina management.
Skill Selections
Your main focus, the Swordmaster tree, is divided into three key specializations where you’ll spend the majority of your points.
- The Blade Tree: This is your damage foundation. Prioritize
 Blade Damage and Long Blade Damage passives to amplify your core weaponry. Dance of Blades is non-negotiable for PvE, as it provides a significant damage boost (up to 50% at level 3) after each kill, allowing you to chain your effectiveness against groups.
 - The Way Tree: Your stamina management comes from here. Knee Charge is your primary engagement tool. Follow with General Conditioning and Optimized Hydration for maximum stamina, and Disciplined Breathing for rapid stamina recovery. This tree ensures you can keep fighting long after others would have succumbed to exhaustion.
- The Will Tree: Your survivability toolkit. Solid Stance reduces the poise damage you take, making you harder to stagger, while Bleed Tolerance provides specific counterplay against bleed-focused enemies. Thrive on Danger can be a lifesaving technique when you find yourself at low health, providing enhanced regeneration and reduced stamina costs.
 Blade Damage and
  Dance of Blades is non-negotiable for PvE, as it provides a significant damage boost (up to 50% at level 3) after each kill, allowing you to chain your effectiveness against groups.
 Knee Charge is your primary engagement tool. Follow with
  General Conditioning and
  Optimized Hydration for maximum stamina, and
  Disciplined Breathing for rapid stamina recovery. This tree ensures you can keep fighting long after others would have succumbed to exhaustion.
 Solid Stance reduces the poise damage you take, making you harder to stagger, while
  Bleed Tolerance provides specific counterplay against bleed-focused enemies.
  Thrive on Danger can be a lifesaving technique when you find yourself at low health, providing enhanced regeneration and reduced stamina costs.
Cross-Class Synergies
A master of Arrakis draws knowledge from multiple schools. Dipping into other disciplines elevates your effectiveness from a simple warrior to a true battlefield duelist.
- Trooper (Tactical Tech Tree): The key draw here is Shigawire Claw for its unparalleled mobility, and Battle Hardened for its incredible 30% cooldown reduction on Trooper class abilities. This dramatically increases your uptime on your crucial engagement and escape tools.
- Bene Gesserit (Body Control Tree): For raw survivability, this tree is unmatched. Passives like Vitality and Self-Healing substantially increase your health pool and regeneration, making you incredibly difficult to take down.
 Trauma Recovery further improves the rate and amount of healing you receive.
 - Planetologist (Scientist Tree): While not directly combat-focused, the utility from this tree is invaluable for sustained operations in the Deep Desert. Cutteray Mining improves your resource gathering, while Rerouting and Overcharge increase your power recharge rate and maximum capacity, directly benefiting your shield usage.
 Shigawire Claw for its unparalleled mobility, and
  Battle Hardened for its incredible 30% cooldown reduction on Trooper class abilities
 Vitality and
  Self-Healing substantially increase your health pool and regeneration, making you incredibly difficult to take down.
  Trauma Recovery further improves the rate and amount of healing you receive.
 Cutteray Mining improves your resource gathering, while
  Rerouting and
  Overcharge increase your power recharge rate and maximum capacity, directly benefiting your shield usage.
Skill Point Allocation
| Class | Tree | Priority Skills | Role in Build |
|---|---|---|---|
| Swordmaster | The Blade, The Way, The Will | Knee Charge, Long Blade Damage, Dance of Blades, General Conditioning, Disciplined Breathing | Core damage, stamina management, and survivability. |
| Trooper | Tactical Tech | Shigawire Claw, Battle Hardened | Mobility and ability cooldown reduction. |
| Bene Gesserit | Body Control | Vitality, Self-Healing, Trauma Recovery | Increased health pool and healing effectiveness. |
Weapons, Armor, and Essential Tools
A warrior’s worth is measured by their steel and their understanding of it. For the PvE Swordmaster, gear choices are designed to maximize lethality while providing enough survivability to withstand the relentless assaults of Arrakis’s dangers.
Your Weapon
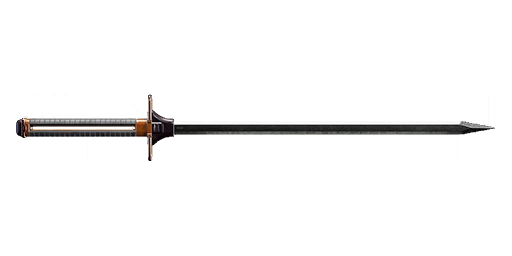


- Primary Weapon – Replica Pulse Sword: Your journey begins with the Jolt-sword, awarded upon completing the final Swordmaster Advanced Trainer Quest, “The Last Stand of Seron Varlin“. This is a more than capable weapon that will serve you well, providing a small stamina boost on parry that synergizes perfectly with a defensive playstyle. Your endgame goal, however, is the Replica Pulse Sword, a Mk6 Unique sword considered the best for this build. Finding its schematic requires venturing into the dangerous Deep Desert and checking the weekly loot tables.
- Ranged Weapon – Thufir’s Best/ Regis JABAL Spitdart: While you are a melee specialist, a reliable ranged weapon is essential for applying pressure at range or thinning enemy ranks before engaging. The poison sniper rifle (“Spitdart”) is one of the best weapons in Dune Awakening for PvE. Thufir’s Best is a fantastic and free option, rewarded from the Mentat Advanced Trainer Questline, and is excellent for taking out unshielded troopers from a distance before you close in .
Armor and Tools
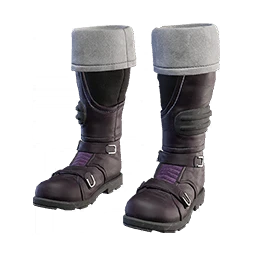
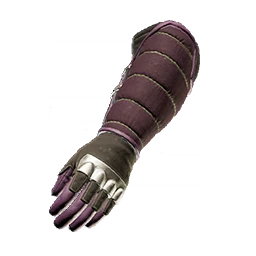
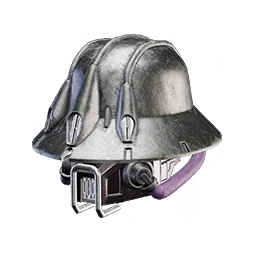
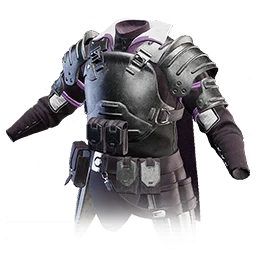
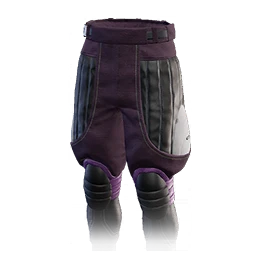
- Armor – Heavy for Survival: Contrary to what one might expect, Heavy Armor is recommended for the Swordmaster PvE build. The reason is simple: in PvE, most damage you’ll take is from ranged dart weapons, not other melee attackers. The high dart mitigation of heavy armor provides crucial survivability for closing the distance. The Acheronian Set is widely regarded as the best heavy armor in the game, with each schematic piece found in chests in Shaitan’s Grotto.
- Essential Equipment: Your loadout is incomplete without a
 Full Suspensor Belt for general mobility and navigating the verticality of Arrakis’s terrain. A high-tier Holtzman Shield is critical for survivability in direct fights, and a high-quality
  Power Pack ensures your shield regenerates quickly. As with all builds, always carry high-tier Literjons of water.
 Full Suspensor Belt for general mobility and navigating the verticality of Arrakis’s terrain. A high-tier
 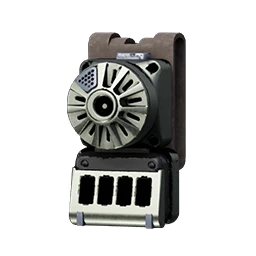 Holtzman Shield is critical for survivability in direct fights, and a high-quality
 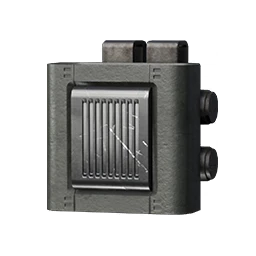 Power Pack ensures your shield regenerates quickly. As with all builds, always carry high-tier
 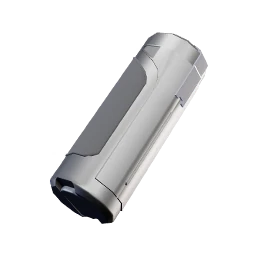 Literjons of water.
Playstyle and Strategy
Knowing your skills and gear is one thing; applying them with the disciplined aggression of a Ginaz master is another. Your combat process is a methodical, three-phase cycle against the AI denizens of Arrakis.
Phase 1: Engagement
Your engagement begins with choosing the right moment and approach. A direct charge against a prepared group is foolishness, not courage.
- Identify Your Prey: Use terrain and observation to identify priority targets. Enemy snipers, flamethrower mobs, and elite shielded troopers should be your primary focus. Use your Spitdart to eliminate or weaken them before committing to melee .
- Initiate with Control: Use cover and verticality to approach unseen. Your ideal engagement starts with you already in medium-close range. Open with Knee Charge to deal significant damage and, most importantly, apply a severe stagger to your primary target .
Phase 2: Execution
Once committed, your aggression must be absolute. Hesitation is death against the automated precision of Imperial troopers.
- Apply Relentless Pressure: The moment Knee Charge lands, your opponent is vulnerable. Follow up with basic attacks to build poise damage. Against groups, immediately use Eye of the Storm to damage all surrounding enemies.
- Utilize Your Mobility for Positioning: Your mobility tools are not just for engagement. Use Shigawire Claw to rapidly change elevation and avoid linear fire from troopers. Reposition constantly to avoid being surrounded, as groups of enemies, especially those with flamethrowers, can be challenging.
- Manage Your Resources: While you are dealing damage, you must carefully manage your stamina. Disciplined Breathing is your best friend here. Avoid spamming dashes unnecessarily; your goal is to maintain enough stamina for a defensive dodge or a follow-up Knee Charge.
 Eye of the Storm to damage all surrounding enemies.
Phase 3: Sustainment and Survival
PvE encounters are often wars of attrition. Your ability to sustain damage and recover is key to conquering the Deep Desert’s toughest challenges.
- Parrying: One of the Swordmaster’s most significant mechanics is parrying. Once you become used to predicting incoming melee attacks, you can use abilities like Retaliate or Foil to not only avoid damage but also respond with a devastating counterattack that applies bleed or reduces the enemy’s damage .
- Use Your Defensive Tools: Don’t hesitate to use Deflection when facing multiple ranged enemies. This ability allows you to deflect incoming darts as long as your stamina holds out, giving you a crucial window to close the distance or retreat.
- Craft and Use Multiple Healkits: The Swordmaster takes on a very aggressive melee playstyle that will see you taking damage. Be sure to craft plenty of Healkits so you can stay in the fight. The Field Medicine passive will enhance the instant healing from these kits, making your downtime shorter.
 Retaliate or
  Foil to not only avoid damage but also respond with a devastating counterattack that applies bleed or reduces the enemy’s damage
  Deflection when facing multiple ranged enemies. This ability allows you to deflect incoming darts as long as your stamina holds out, giving you a crucial window to close the distance or retreat.
 Field Medicine passive will enhance the instant healing from these kits, making your downtime shorter.
Final Thoughts
The PvE Swordmaster Build is more than a collection of skills and gear; it is a declaration of principles. In a world of lasguns and artillery, you choose the intimacy and certainty of the blade. This build is not the easiest on Arrakis, but for those with the discipline to master it, it is one of the most satisfying and powerful.