
In the brutal, sun-scorched expanse of Arrakis, survival favors not the strong, but the smart. Where others rely on brute force or blinding speed, you will wield a far more potent weapon: calculative intellect. This is the way of  the Sentinel Mentat (PvP Mentat), a build dedicated to absolute battlefield control. You are the unseen architect of the fight, a tactical genius who turns the terrain into a lethal chessboard. Before a single dart is fired, your victory is already being calculated.
This guide will help you forge yourself into that master strategist. We will delve into the essential skills that make you a fortress, the best tools for the job, and the patient, methodical playstyle required to dominate engagements on your terms.
Skill Selections
Your PvP Mentat power is a function of your skill points, meticulously allocated to create an impenetrable defensive web. The following tables outline the core components of your build, focusing on the synergy between the Mentat’s tactical gadgets and supportive skills from other Classes.
Mentat Skill Selections
| Skill Tree | Skill | Points | Notes |
|---|---|---|---|
| Mental Calculus | The Sentinel | 3/3 | Deploys an autonomous turret for area control. |
 Ranged Damage | 3/3 | Boosts all ranged attacks. | |
 Marksman | 3/3 | Enhances precision weapon accuracy. | |
 Rifle Damage | 3/3 | Increases rifle-type weapon efficiency. | |
| Assassination |  Poison Capsule | 1/3 | Adds poison effect to attacks. |
 Poison Mine | 3/3 | Deploys mines dealing poison damage. | |
 Headshot Damage | 3/3 | Increases headshot multiplier. | |
 Assassin’s Shot | 3/3 | High-damage precision strike. | |
| Tactician |  Shield Wall | 3/3 | Deploys a defensive energy barrier. |
 Gravity Mine | 1/1 | Creates a pull-field trap. | |
 Solido Decoy | 1/1 | Creates a holographic decoy. | |
 Iron Will | 1/1 | Boosts resilience temporarily. |
Trooper Skill Selections
| Skill Tree | Skill | Points | Notes |
|---|---|---|---|
| Gunnery |  Disruptor Damage | 3/3 | Improves damage output of disruptor weapons. |
| Suspensor Training |  Gravity Field | 1/1 | Creates an area of low gravity. |
 Suspensor Efficiency | 3/3 | Reduces suspensor energy cost. | |
 Collapse Grenade | 1/1 | Area-of-effect grenade with gravity implosion. | |
 Suspensor Blast | 1/1 | Emergency knockback blast. | |
| Tactical Tech |  Shigawire Claw | 1/3 | Melee tether tool for close encounters. |
Planetologist Skill Selections
| Skill Tree | Skill | Points | Notes |
|---|---|---|---|
| Scientist |  Cutteray Mining | 1/3 | Enhances resource extraction efficiency. |
 Rerouting | 3/3 | Increases energy regeneration rate. | |
 Overcharge | 3/3 | Temporarily boosts equipment output. | |
| Mechanic |  Vehicle Repair | 3/3 | Increases vehicle repair speed and effectiveness. |
 Fuel Efficient Driver | 1/3 | Reduces vehicle fuel consumption. | |
Fuel Efficient Pilot | 3/3 | Extends vehicle operational range. | |
 Heat Management | 1/1 | Prevents overheating in harsh environments. |
Swordmaster Skill Selections
| Skill Tree | Skill | Points | Notes |
|---|---|---|---|
| The Way |  Knee Charge | 1/3 | Quick forward dash for engagement. |
 Field Medicine | 3/3 | Increases healing received and applied. | |
 Optimized Hydration | 3/3 | Boosts stamina recovery. | |
 Disciplined Breathing | 1/3 | Enhances focus and endurance. | |
 General Conditioning | 3/3 | Improves all physical attributes. |
Bene Gesserit Skill Selections
| Skill Tree | Skill | Points | Notes |
|---|---|---|---|
| Body Control |  Recovery | 1/3 | Increases passive regeneration. |
 Trauma Recovery | 3/3 | Reduces recovery time from injuries. | |
 Self-Healing | 3/3 | Allows moderate self-regeneration during combat. | |
 Vitality | 3/3 | Boosts overall health and resilience. |
Weapons and Armor
A Mentat’s calculations are only as good as the tools they employ. Your gear is not merely equipment; it is an extension of your will, and selecting the right components is paramount to your effectiveness on the battlefield.
Weapons Selection
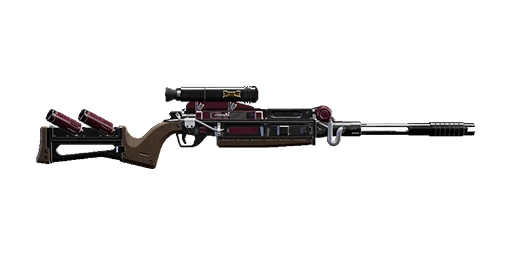
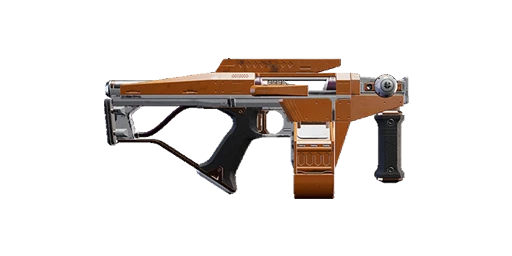
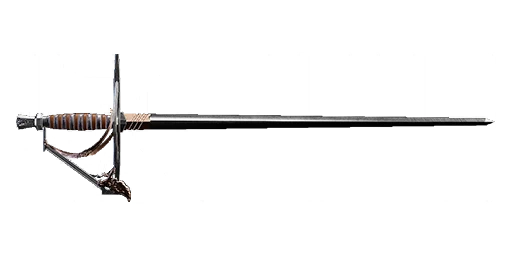
As a Sentinel Mentat, your weapon choice is designed to complement your defensive setup, allowing you to apply pressure at all ranges.
- Primary Weapon –
 Dunewatcher: This is the pinnacle spitdart rifle for this build, offering exceptionally high damage for picking off enemies from a long distance while your turret controls the space between you.
 - Secondary Weapon – A Dart For Every Man: This powerful disruptor is your go-to tool for close-to-mid range emergencies and for rapidly destroying enemy shields, making targets vulnerable to your rifle fire.
- Melee Option –
 Halleck’s Pick: While melee is a last resort, this weapon synergizes thematically with the Mentat’s calculated approach and can be a serviceable tool for extracting yourself from the direst situations.
The Bulwark Armor Set
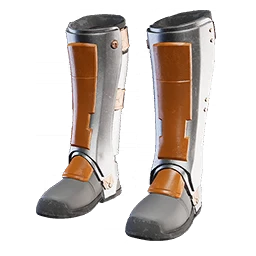
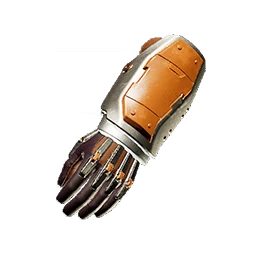

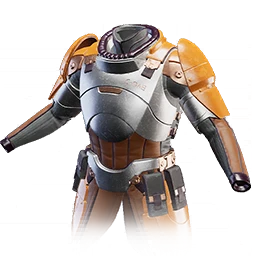
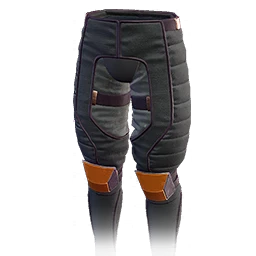
For armor, the Bulwark Set is the definitive choice for the Sentinel Mentat in PvP. As a heavy armor set, it provides excellent dart mitigation, which is crucial when you are often stationary and holding a position. While heavy armor can increase stamina costs, your strategy of fighting from a fortified location mitigates this drawback. The high protection ensures you can survive initial volleys and give your traps and turrets time to work.
Essential Equipment
No warrior of Arrakis is complete without their core survival gear.
 Full Suspensor Belt: This belt is essential for general mobility and, more importantly, for gaining the high ground to set up your kill zone.
- Adaptive Holtzman Shield: Your personal shield is your last line of defense. The Adaptive Holtzman Shield is recommended for its increased survivability in direct fights.
 Full Suspensor Belt: This belt is essential for general mobility and, more importantly, for gaining the high ground to set up your kill zone.
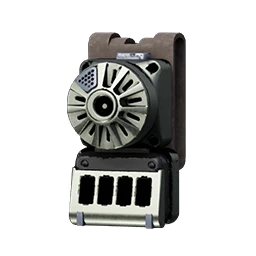 Adaptive Holtzman Shield: Your personal shield is your last line of defense. The Adaptive Holtzman Shield is recommended for its increased survivability in direct fights.
Playstyle and Strategy
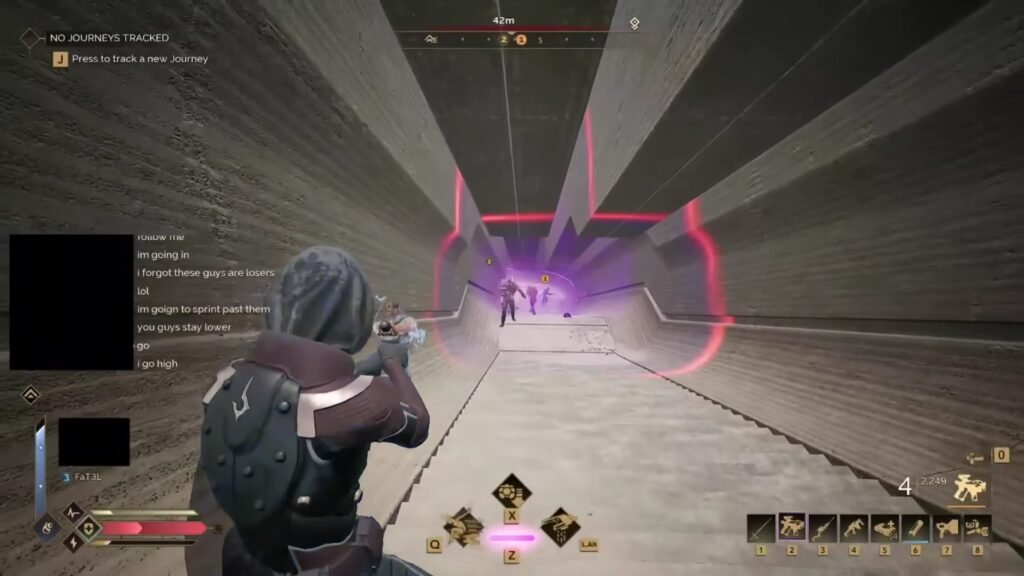
Knowing your skills and gear is one thing; applying them with the cold, precise logic of a Mentat is another. Your engagement process is a methodical three-phase cycle.
Phase 1: Preparation
Your engagement begins long before your rifle fires. It begins with observation and positioning, the hallmarks of a true strategist.
- Master the Terrain: The deserts and structures of Arrakis are filled with strategic choke points and high ground. Your first calculation is to find a position that limits enemy approach vectors and gives you a clear field of fire .
- Deploy Your Web: Before engaging, always deploy
 The Sentinel in a position that covers your most vulnerable flank or a key approach route. Place your Shield Wall at your feet or between you and the expected direction of attack to create instant cover . For extra control, layer a
  Gravity Mine and Poison Mine in a choke point to devastate anyone who tries to push through.
Phase 2: Execution
When your preparation is complete, you have turned your position into a deathtrap. Now, you initiate the engagement with overwhelming control.
- Let Your Tools Work For You: Often, your traps and turret will engage first. Use the distraction and damage they provide to line up careful shots. Your Marksman and Headshot Damage passives mean every shot you take should be deliberate and aimed for the head.
- Priority Target Selection: Use your Mentat training to identify high-value targets. Who is the most aggressive rusher? Who is dealing the most damage? Focus your fire on them as they are slowed and poisoned by your gadgets.
- Shield Management: If a target is shielded, use your secondary disruptor, A Dart For Every Man, to rapidly drain their shield before finishing them with your rifle.
Phase 3: Adaptation
A static fortress can be besieged. A smart one moves.
- Reposition When Compromised: If your position is being overwhelmed or flanked, do not hesitate to fall back. Use your Suspensor Blast to create space from pushers, and use your Full Suspensor Belt to relocate to a secondary pre-scouted position.
- Re-establish Control: Your cooldowns are your lifeblood. The moment you are safe in a new location, begin the preparation phase again. Deploy a new
 Shield Wall and The Sentinel to make your new position just as deadly as the last.
Final Thoughts
The satisfaction of this build does not come from a frantic, high-kill streak, but from the quiet certainty of watching a perfectly laid plan unfold exactly as calculated. Seeing an enemy squad hesitate at the edge of your kill zone, desperately trying to find a way through your web of traps and turrets, is a victory in itself.
This build teaches you to read the battlefield not as a scene of chaos, but as a system of vectors, chokepoints, and probabilities. It is, in the purest sense, the embodiment of the Mentat ideal: you are a human computer, and the sands of Arrakis are your dataset.