
The Great Axe and War Hammer pairing is one of the Best Builds in New World. By scaling both weapons exclusively with Strength, you create a high-impact character capable of delivering massive Area of Effect (AoE) damage while simultaneously disrupting the entire enemy backline. Whether you are diving into a chaotic PvP “clump” or rounding up mobs in an Expedition, this build excels at controlling the flow of battle through superior positioning and heavy-hitting strikes.
Recommended Attribute Distributions

The best attribute points for this build depend on whether you want to focus on high damage (Bruiser) or survivability (Tank). Since both weapons scale 100% with Strength, this will always be your primary damage stat.
| Build Type | Strength (STR) | Constitution (CON) | Description |
|---|---|---|---|
| Pure DPS | 500 | 100 | Maximizes raw damage for end-game PvP/PvE. Lower health requires better dodging. |
| Balanced Bruiser | 250 | 350 | Standard “Bruiser” setup. Provides a massive boost to armor and survivability while keeping solid damage. |
| Tank | 200 | 400 | Grit on all light/heavy attacks (from 300 CON). Ideal for holding points in Wars or tanking Expeditions. |
| Early Game (1-20) | 100-150 | 50-100 | Prioritize Strength early to clear mobs faster. |
Weapon Masteries
Great Axe Mastery

Your Great Axe serves as the primary engagement tool, responsible for target acquisition, positioning disruption, and setting up kill windows. The ability selection focuses on controlling space and denying enemy movement options.
 Gravity Well: This remains your signature crowd control ability and the cornerstone of the bruiser’s kit. By creating a 10-meter vortex that pulls enemies to its center and roots them, it sets up devastating combos for both you and your teammates.
- Maelstrom: Perform a fast, spinning attack that pulls targets within a 2.5m radius closer to you. Deals 110% weapon damage.
- Flex Slot (Charge vs. Reap): Your third ability slot offers meaningful choice based on your role. Charge provides crucial gap-closing and disengage potential. Reap Extend your axe 5m, pulling foes to you and dealing 80% weapon damage and staggering struck foes.
 Charge provides crucial gap-closing and disengage potential.
 Great Axe Passive Priorities
| Priority | Passive Name | Effect |
|---|---|---|
| Critical |  Mauler’s Fury | Attacks grant stacking 3% damage (Max 10 stacks) |
| High |  Blood Lust | Move 20% faster toward foes within 14m, and dealing 15% more damage. |
| High |  Death’s Embrace | 10% armor penetration against targets below 50% HP |
| Medium |  Executioner’s Speed | Hitting 2+ targets with light attacks grants 20% haste |
War Hammer Mastery
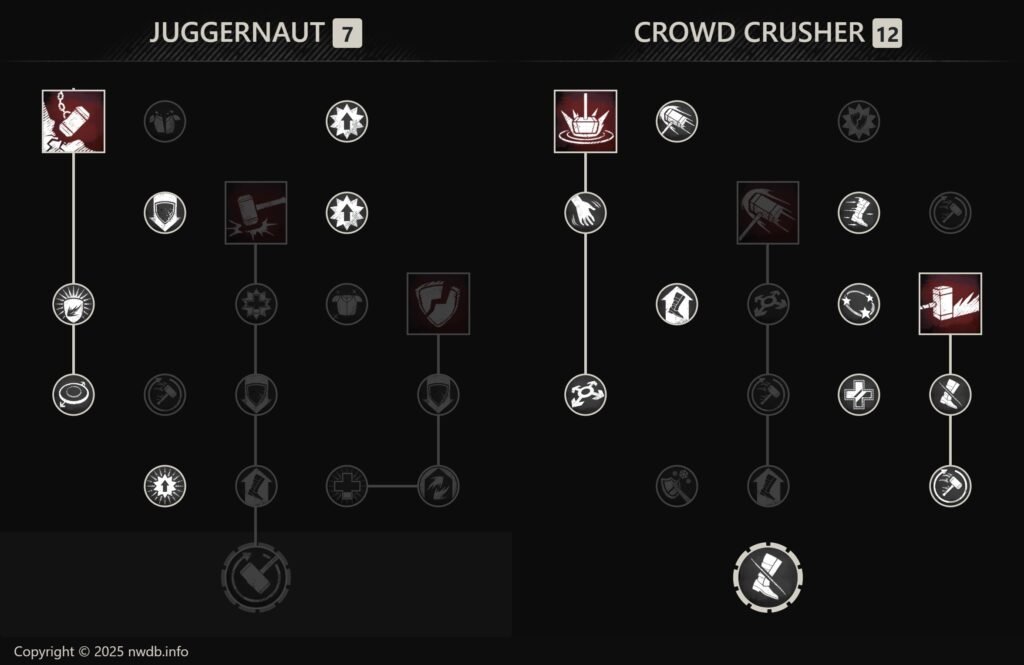
Where the Great Axe sets the table, the War Hammer serves as the verdict that finishes the meal. This weapon specializes in extending control windows and converting gathered enemies into casualties through devastating crowd control chains.
- Shockwave: Slam your war hammer into the ground, causing a 3m radius earthquake that deals 60% weapon damage, staggering and stunning all impacted targets for 2s.
- Wrecking Ball: Strike the ground with your war hammer, dealing 90% weapon damage and knocking down your target.
- Path of Destiny: A powerful ground strike that erupts a linear wave of energy in front of the player, dealing 70% weapon damage to all targets in its path.
 Shockwave: Slam your war hammer into the ground, causing a 3m radius earthquake that deals 60% weapon damage, staggering and stunning all impacted targets for 2s.
 Wrecking Ball: Strike the ground with your war hammer, dealing 90% weapon damage and knocking down your target.
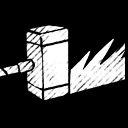 Path of Destiny: A powerful ground strike that erupts a linear wave of energy in front of the player, dealing 70% weapon damage to all targets in its path.
War Hammer Passive Priorities
For Bruiser build, your War Hammer passives should prioritize damage scaling against debuffed enemies, cooldown reduction, and survivability while you have Grit active.
| Priority | Passive Name | Reason |
|---|---|---|
| Critical |  Power Through Pain | Grants a massive damage boost for 1s after taking damage; essential for front-line trading. |
| Critical |  Aftershock | Slows all enemies hit by any CC ability. This “locks” them in your Great Axe’s  Gravity Well longer. Gravity Well longer. |
| Critical |  Outnumbered | Increase armor if surrounded by 2 or more enemies within 3m. |
| High |  Concussive Impact | +15% damage against enemies with War Hammer debuffs (Stun, Flatten, Slow). |
| High |  Prevailing Spirit | Heals you for 35% of damage done by Crowd Crusher abilities (Shockwave/PoD), providing vital sustain. |
| High |  Facilitated Expedition | Increases movement speed when hitting an enemy with a debuff, helping you stick to targets. |
| Medium |  Epitome of Bonk! | Grants +10% armor penetration for all War Hammer attacks. Solid for heavy-armor targets. |
| Medium |  Exhaustive Attacks | Applies Exhaust to targets, slowing their stamina regeneration and making it harder for them to dodge. |
| Medium |  Acceleration | Reduces cooldowns when hitting debuffed enemies with light attacks; useful for cycling your CC faster. |
Perks and Jewelry
Best Perks
Gear optimization separates competent bruisers from dominant frontline forces who dictate the terms of engagement. While obtaining perfect gear takes time, understanding the priority system helps you make incremental upgrades along the way.
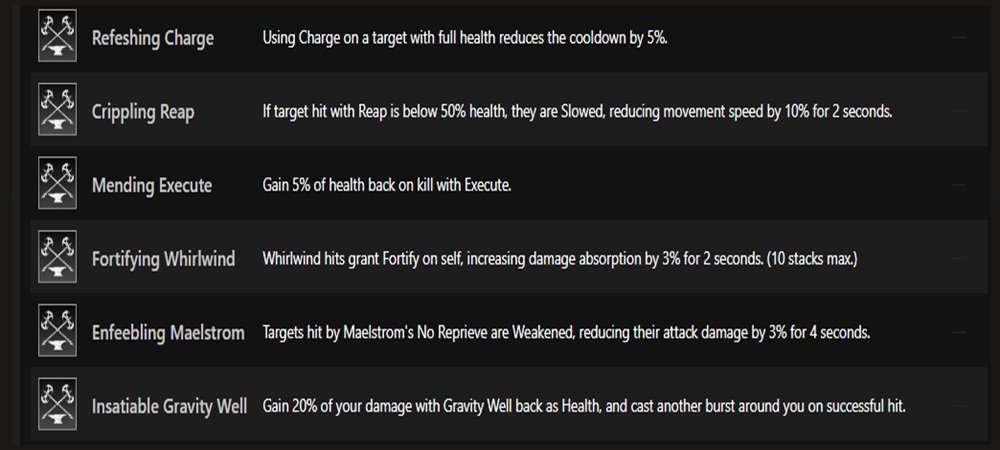
- Great Axe Perks: The legendary combination includes Thwarting Strikes (increased damage while you have active Grit), Refreshing Move (cooldown reduction on light/heavy attacks), and Enfeebling Maelstrom (weakens enemies caught in your Maelstrom).
- War Hammer Perks: Prioritize Sundering Shockwave (Shockwave inflicts Rend, reducing the target’s armor), followed by Plagued Strikes (Heavy attacks reducing effectiveness and outgoing healing on the target).
- Armor Perks: Your armor should stack Freedom (3-5 stacks recommended to reduce crowd control duration), Elemental Aversion (versus magical damage sources), and specific ability perks like Insatiable Gravity Well (healing when Gravity Well collapses) and Fortifying Whirlwind (if using Whirlwind).
Armor Perk Priority
| Perk Name | Effect | Priority | Recommended Slots |
|---|---|---|---|
| Freedom | Reduces crowd control duration | Highest | 3-5 pieces |
| Elemental Aversion | Reduces elemental damage | Highest | 3-4 pieces |
| Insatiable Gravity Well | Heal based on enemies in well | High | Chest/Legs |
| Refreshing | Reduces all cooldowns | Medium | Any |
| Shirking Fortification | Gain fortify on dodge | Medium | 1-2 pieces |
Jewelry and Heartrune Selection
- Amulet: Health, Divine, and Shirking Empower create the ideal defensive combination. The Ankh artifact provides additional sustain through its potion-boosting effects.
- Ring: Smooth Bone Ring (from Garden of Genesis) provides excellent damage output with its crit and damage against full-health targets, while Champion’s Ring from the PvP track offers a reliable alternative.
- Earring: Doom’s Chance (from Lazarus Instrumentality) provides the essential refreshing toast and regenerating perks that keep you in fights longer.
- Heartrune: The Brutal Heartrune of Detonate serves as your primary choice for offensive plays—prime it as you engage with Gravity Well and detonate as the stun lands for massive area damage. Alternatively, Stoneform provides crucial cleanse and damage reduction when facing multiple disabling effects.
Rotation
Mastering the bruiser role requires orchestrating your abilities in a precise sequence that maximizes crowd control duration and damage overlap. A perfectly executed engagement unfolds with a distinct rhythm:
- Opening Setup: Position at the edge of the enemy clump rather than diving directly into its center. Use terrain, doorways, siege rubble, cart corners to approach without donating a free kill. Watch enemy dodge patterns and wait for the moment their collective stamina is low.
- Initial Engagement: Trigger Gravity Well the instant an enemy dodge cycle completes. Buffer Maelstrom immediately to pull targets tighter while they’re still reacting to the initial pull. This two-step gathering process ensures maximum target density for follow-up damage.
- Control Extension: Weapon swap to War Hammer and lead with Wrecking Ball for the knockdown and personal Fortify, followed immediately by Shockwave to stun the entire group. The Rend from Shockwave‘s perk makes all subsequent hits land significantly harder.
- Damage Capitalization: Use Path of Destiny to catch any stragglers at the edge and extend the period of enemy helplessness. Activate your Detonate Heartrune as the Shockwave stun connects for massive area burst damage.
- Cleanup Phase: Swap back to Great Axe and use Charge or Reap to pursue any survivors who attempted to escape. Your Blood Lust passive will grant movement speed to ensure they cannot outrun you.
Tactics and Adaptations
PvE Applications
While optimized for player-versus-player combat, this build transitions surprisingly well into expeditions and endgame PvE content. The same crowd control abilities that dominate Wars become invaluable for managing enemy mobs and controlling battlefield flow.
Gravity Well excellently corrals adds for area-of-effect damage from your allies, while  Maelstrom gathers strays into cleanly defined kill zones. War Hammer control suppresses dangerous enemy casts and creates breathing room for healers. For boss encounters, adjust your flex skills toward consistent uptime.
  Reap‘s pull and sustain becomes particularly valuable in these scenarios.
Your gem configuration should shift toward Strike damage protection (Onyx) when facing primarily physical bosses, while maintaining elemental resistance for magical encounters.
Final Thoughts
The Great Axe and War Hammer bruiser embodies the essence of frontline dominance in New World’s large-scale combat. This build isn’t about flashy individual plays—it’s about creating opportunities for your entire team through relentless pressure and impeccable control.