To excel in Albion Online’s Faction Warfare, your build must balance raw power with the specific demands of large-scale open-world combat. Unlike solo dungeons or small-scale ganking, Faction Warfare often involves massive Zergs, where Area of Effect (AoE) damage, crowd control, and survivability become the deciding factors between a successful push and a total wipe. Choosing the right Weapon and Build it’s about fulfilling a role that complements your faction’s momentum.
The most effective builds are generally categorized by the scale of the engagement. For solo or small-group players, high mobility and self-sustain are vital for capturing outposts and escaping coordinated ambushes. However, if you are joining a main faction blob, your build should prioritize utility, such as clumping enemies together, providing defensive shields to allies, or dropping massive burst damage on a caller’s command. This Albion Online guide highlight the best Faction Warfare builds that balance performance with the chaotic reality of the front lines.
Best Solo Faction Warfare Builds
These builds focus on mobility and self-sustain, allowing you to capture outposts or engage in small skirmishes without a dedicated healer.
The Battleaxe
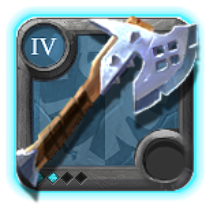
The Battleaxe is a premier choice for Solo Faction Warfare due to its exceptional self-sustain and versatile dueling capabilities. It allows solo players to cap outposts efficiently and survive unexpected 1v1 or 1v2 encounters while roaming.
This build focuses on maximizing the Battleaxe’s innate healing to outlast opponents.
| Item Slot | Choice | Reasoning |
|---|---|---|
| Off-Hand | 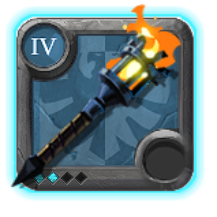 Torch | for faster auto attacks, and Cooldowns. |
| Head |  Specter Hood | Flash of Insight resetting your Jacket cooldown for double healing. |
| Armor |  Mercenary Jacket | Bloodlust provides essential healing per hit, perfect for brawling. |
| Shoes |  Soldier Boots | Wanderlust for long-distance chasing or escaping Zergs. |
| Cape | 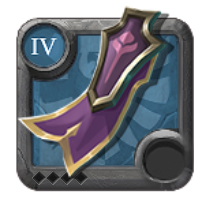 Thetford Cape | Adds consistent AoE chain-lightning damage to your auto-attacks. |
| Food / Potion |   Roast Pork / Poison | Roast Pork for lifesteal; Poison to secure kills on running targets. |
Key Skills & Strategy
- Q:

Rending Rage: Use the first two casts for damage and bleed stacks. Only use the third cast if you need to root a target, as it resets your bleed stacks. - W:

Adrenaline Boost: Increases your movement and attack speed, allowing you to trigger Mercenary Jacket heals rapidly. - E:
Blood Bandit: This is your “reset” button. Throwing the axe at a target with 3 bleed stacks provides a massive burst of health. It has two throws; the second one is the primary heal. - Passive:
Life Leech: Every auto-attack restores a small amount of health, keeping you topped off while clearing outpost guards.
Soloing Outpost Bosses
The Battleaxe is one of the few builds that can realistically solo faction outpost bosses. By rotating your Mercenary Jacket and Battleaxe (E) heals while dodging the boss’s telegraphed AoE attacks, you can capture outposts without a group—though it may take several minutes.
Bloodletter Build
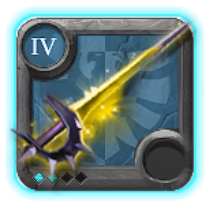
The Bloodletter is the ultimate high-stakes choice for Solo Faction Warfare, specializing in mobility and lethal execution. While the Battleaxe outlasts enemies, the Bloodletter thrives on “ratting” and pick-offs—zipping through the chaos to execute low-health targets and escaping before the enemy Zerg can react.
This build focuses on high burst damage and maximum cooldown reduction to ensure you always have an escape route.
| Item Slot | Choice | Reasoning |
|---|---|---|
| Off-Hand | Torch | for faster auto attacks, and Cooldowns. |
| Head | 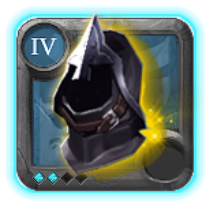 Stalker Hood | Mortal Agony: Reveals invisible enemies and increases damage against low-health targets. |
| Armor | 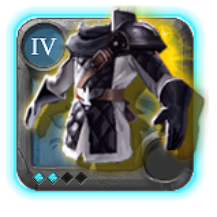 Stalker Jacket | Provides an AoE Electric Field that melts enemies while you stay in melee range. |
| Shoes | Soldier Boots | Wanderlust for long-distance chasing or escaping huge enemy groups. |
| Cape |  Undead Cape | The ultimate safety net; turns you invisible if your health drops below 15%. |
| Food / Potion |  Beef Stew / Poison | Beef Stew for raw damage; Poison to slow enemies and prevent them from mounting. |
Key Skills & Strategy
- Q:
Deadly Swipe: A short-range dash that deals damage and increases your damage output by 6% per stack. It’s excellent for repositioning and dodging enemy abilities. - W: Dash: Use

Dashfor pure mobility and escapes, or to close the gap when your target is trying to run. - E:
Lunging Stabs: This is your finisher. If an enemy’s health bar is below 40%, this skill deals massive damage. If you don’t kill them, use it as a massive dash to get away. - Passive:

Deep Cuts: Every 4th normal attack deals additional bleed damage, adding more pressure to your targets.
Solo Playstyle: The Finisher
Unlike the Battleaxe, you should not initiate fights against full-health groups. Instead, lurk on the edges of large Faction fights. Wait for the Zerg to “clump” and drop an enemy’s health low, then dive in with your Stalker Jacket active, use your E to execute the target, and immediately dash out. You are the “clean-up crew,” collecting Faction Points from players who thought they had escaped.
Best Group & ZvZ Builds
In large-scale warfare, your role is more specialized. DPS builds aim for maximum Area of Effect (AoE) damage, while supports focus on crowd control and buffs.
Earthrune Staff

The Earthrune Staff is a top-tier choice in Albion for tanks in group play and Faction Warfare due to its dual-phase utility and unmatched resilience. In the chaotic environment of Faction Warfare, the weapon’s utility is unmatched for setting up devastating team combos. Through the ![]()
Tectonic Shift ability, the Golem can summon a stone wall that forcefully pulls all nearby enemies toward you.
| Slot | Recommended Item | Ability Selection and Reason |
|---|---|---|
| Head |  Knight Helmet | Displacement Immunity: Prevents you and allies from being pushed or pulled during an engage. |
| Body |  Judicator Armor | Force Shield: Creates a protective bubble that increases ally healing received and provides damage resistance.Passive: Toughness and Spirit Crush |
| Boots |  Hunter Shoes | Rush: Provides 120% Move speed and long-duration Crowd Control Effects boost to reach the enemy backline and stun enemies as much as possible. |
| Cape |  Martlock Cape | Automatically increasing your Defense by 50% when your health drops below 25%. |
| Consumables |  Beef Sandwich + Gigantify | Increase survivability in large scale PvP. |
Key Skills & Strategy

Pulse Shock: This is the most reliable choice for tanks. It hits multiple enemies in a cone, reducing their damage resistances and applying one Shift Charge for every enemy hit (up to 2 per cast). Its short 4-second cooldown allows you to stack charges rapidly.
Positional Drift: is more utility-focused; you can pull up to 5 enemies, and rooting them.- Passive:

Rulebender: After using your W-Ability, your cast speed is increased. This is critical because it allows you to cast your Qs and transformation faster, reducing the window where enemies can interrupt your engage.
Group Playstyle
Once your team is ready to engage, you utilize your mobility abilities Hunter Shoes (F: ![]()
Rush) and ![]()
Positional Drift![]()
Tectonic Shift combo to pull enemies into a tight cluster, immediately following up with Tectonic Slam to knock them up and reduce their maximum health. This creates a massive window for your DPS to land their strongest abilities on a vulnerable, concentrated group of targets.
Permafrost Prism Build

The Permafrost Prism is the cornerstone of any Faction Warfare “Zerg,” acting as a massive Area of Effect (AoE) hammer that can shatter entire enemy formations. While the Battleaxe brawls and the Bloodletter executes, the Permafrost Prism dominates the battlefield by locking down dozens of players in ice and melting them with rapid-ice spells.
This build is designed for maximum “clump” damage, allowing you to delete multiple enemies simultaneously when your faction leader calls for an engagement.
| Item Slot | Choice | Reasoning |
|---|---|---|
| Head |  Assassin Hood | Meditation resets your E cooldown, letting you drop two nukes in one fight. |
| Armor |  Scholar Robe | Speed Caster provides 50% faster cast speed, turning you into a machine gun. |
| Shoes |  Stalker Shoes | Raging Blink increases your damage for a short burst after repositioning. |
| Cape |  Morgana Cape | Triggers massive cast speed once you use your E, perfect for spamming spells. |
| Food / Potion |   Pork Omelette / Resistance | Omelette for cooldown reduction; Resistance Potion to survive being dove. |
Key Skills & Strategy
- Q:

Ice Shard: Your bread and butter. It has no cooldown, meaning you can spam it as fast as your cast speed allows during a “Speed Caster” or “Morgana” window. - W:

Frost Nova: A crucial utility spell that blinks you forward and freezes enemies around you. Use it to escape danger or to aggressively position for a perfect E. - E:

Ice Crystal: This is your “Big Move.” It creates a massive explosion that stuns and deals heavy damage. Always aim for “clumps”—groups of 5 or more enemies pulled together by your tanks. - Passive:

Aggressive Caster: Every 4 spells cast, you gain a massive speed boost to your next spell, synergizing perfectly with your spammable Q.
Group Playstyle: The Backline Artillery
As a Permafrost player, you are the definition of a “glass cannon.” Your goal is to stay behind your tanks and wait for the “Engage” call. When the enemy is clumped, you use Frost Nova (W) to get in range, drop Ice Crystal (E), activate Scholar Robe, and hold down your Q key to rain shards on the survivors. Once your spells are on cooldown, use Assassin Hood to get them back immediately and repeat the carnage.
Rootbound Staff

The Rootbound Staff is the ultimate defensive anchor for Group & ZvZ Faction Warfare. While the Permafrost Prism shatters enemies, the Rootbound Staff ensures your allies never fall. By transforming into a massive Sylvian (Tree), you provide unique shields, crowd control immunity, and health buffs that allow your faction’s “blob” to survive the most devastating enemy engages.
This build turns you into a “Midline Support” that bridges the gap between your front-line tanks and back-line mages.
| Item Slot | Choice | Reasoning |
|---|---|---|
| Head | Assassin Hood | Meditation is mandatory to reset your long transformation and shield cooldowns. |
| Armor |  Judicator Armor | Provides a massive defensive aura (Force Shield) to protect allies while you are in human form. |
| Shoes |  any Leather Shoes | Refreshing Sprint helps reduce your cooldowns further while providing mobility. |
| Cape |  Caerleon Cape | Allows you to double-cast your Q: Adapting Matter, quickly building the Shift Charges needed for transformation. |
| Food / Potion |  Pork Omelette / Gigantify | Omelette for faster spells; Gigantify Potion to survive when the enemy focuses you. |
Key Skills & Strategy
- Q:

Adapting Matter(Human): This is your most important human-form spell. It grants shields to up to five allies and, crucially, generates Shift Charges without needing a target—allowing you to prep your transformation before a fight starts. - W:

Polymorph(Human): A powerful tool for “peeling.” Use it to turn an overextended enemy tank or assassin into a harmless critter, stopping their engage instantly. 
Barbed Roots(Transformed W): The game-changer. While channeling, you grant allies immunity to forced movement (like pulls or knocks) and a massive shield. This completely counters enemy “clump” spells.
Group Playstyle: The Defensive Wall
Your job is to watch the enemy’s movement. When you see the enemy Zerg preparing to “dive” or “pull” your team, use your Shift Charges to transform into the Sylvian. Drop your Barbed Roots (W) directly on your team’s feet to negate the enemy’s pull and absorb their initial burst of damage.
Between transforms, use your Judicator Armor and Polymorph to keep your teammates safe. Never let your Shift Charges drop below three, or you won’t be able to use your most powerful abilities when the next engage happens.
Energy Shaper

The Energy Shaper is the definitive “heavy artillery” of the Crossbow line, designed specifically to punish enemy formations in large-scale Faction Warfare and Zerg vs. Zerg (ZvZ) combat. the weapon projects a massive 26m Avalonian beam that pierces through every enemy it touches, making it the ultimate tool for melting “clumps” of players instantly.
This build focuses on raw damage output and cooldown management, allowing you to drop a devastating beam every time your team’s tanks engage.
| Item Slot | Choice | Reasoning |
|---|---|---|
| Head | Assassin Hood | Meditation resets your long E: Balanced Mind |
| Armor |  Druid Robe | Obsessive Burst: for stacking raw damage.Aggression |
| Shoes |  Royal Sandals | Defenseless Rush significantly boosts your damage before firing the beam.Aggression |
| Cape |  Lymhurst Cape | For mana sustain. |
| Food / Potion | Beef Stew / Gigantify | Stew for maximum damage; Gigantify to survive when the enemy tries to focus you. |
Key Skills & Strategy
- Q:

Explosive Bolt: Your primary tool for consistent poke damage from a safe distance while waiting for an engagement. - W:

Caltrops: Essential for self-peel. Place these in front of you to slow approaching enemies and gain a speed boost to reposition. - E:
 : The core of the build. Once your tanks pull enemies together, activate your Royal Sandals, drop your beam, and sweep it across the clump for maximum ticks of damage.
 - Passive:

Furious: Increases your damage even further, ensuring that every tick of your beam hits as hard as possible.
Group Playstyle
The perfect rotation begins with Druid Robe ability ![]()
Obsessive Burst then cast ![]()
Explosive Bolt two times and ![]()
Caltrops one time randomly to stack ![]()
Obsessive Burst, then Royal Sandals ability ![]()
Defenseless Rush to boost your damage, followed by your E: ![]() on the enemy’s location. If the enemy survives and tries to counter-push, use your Assassin Hood to meditate and bring your cooldowns back up instantly. This allows your group to have “double” the firepower in a single protracted fight.
on the enemy’s location. If the enemy survives and tries to counter-push, use your Assassin Hood to meditate and bring your cooldowns back up instantly. This allows your group to have “double” the firepower in a single protracted fight.
Final Thoughts
Success in Faction Warfare ultimately boils down to adaptability. Whether you choose the self-sufficient brawling of the Battleaxe, the opportunistic lethality of the Bloodletter, or the high-impact utility of the Permafrost and Rootbound staves, your effectiveness depends on how well you read the map. Solo builds give you the freedom to influence the war through small captures and sabotage, while ZvZ builds require you to suppress your ego and play as a single gear in a massive, coordinated machine.