
One moment in New World, you are a whirlwind of steel, your Greatsword carving a path through their ranks—the next, you’ve taken a sudden, calculated retreat, the deafening roar of your Blunderbuss shredding the advance of anyone foolish enough to follow. This build merges the overwhelming, close-quarters dominance of the Greatsword with the devastating, short-range burst of the Blunderbuss, creating a hybrid skirmisher that controls the space between melee and ranged combat.
Your role is one of dynamic adaptation. You are the anvil that can become the hammer in a single, fluid weapon swap. With this build, you will master the art of pressure—knowing when to commit fully with your Greatsword‘s stances and when to create distance to unleash a volley of shrapnel and grenades that weaken and break enemy formations.
Attributes and Armor
Attribute Distribution

Your attribute spread is the engine of your hybrid playstyle. The Greatsword scales directly with Strength, making it your primary stat, while the Blunderbuss has unique hybrid scaling, benefiting significantly from both Strength and Intelligence. This allows for a powerful and focused attribute investment.
- The Aggressive Skirmisher (450 Strength / 150 Constitution): This is the premier attribute split for this build for players confident in their survivability. Reaching 450 Strength provides a massive damage increase on target, which you can consistently trigger with your own kit. 150 Constitution gives you a solid health pool and additional armor, ensuring you can stay in the fight longer.
- The Balanced Bruiser (400 Strength / 200 Constitution): For Wars or when learning the build, this split offers exceptional staying power while still hitting the powerful 400 Strength breakpoint for extra physical damage. The extra Constitution provides a much larger margin for error against focus fire.
- The Hybrid Threat (350 Strength / 150 Intelligence / 100 Constitution): A more niche setup that maximizes the Blunderbuss’s magical fire damage from its abilities. While your Greatsword damage will be slightly lower, your Blunderbuss abilities like
 Azoth Shrapnel Blast will hit significantly harder, creating a truly mixed-damage threat that can be difficult to counter.
 Azoth Shrapnel Blast will hit significantly harder, creating a truly mixed-damage threat that can be difficult to counter.
Armor Weight
Your armor weight choice dramatically impacts your engagement style and survivability, offering a clear trade-off between raw power and durability.
- Light Armor: Ideal for maximum damage output and mobility. The +15% damage bonus and extended dodge roll are perfect for players who excel at positioning and timing their engagements. This loadout turns you into a true assassin, capable of deleting targets before they can react. However, it demands excellent awareness, as a single mistake can be fatal.
To achieve the Light equip load, you typically wear a Medium Chest piece with Light helmet, gloves, legs, and boots.
Weapon Masteries
Greatsword Mastery
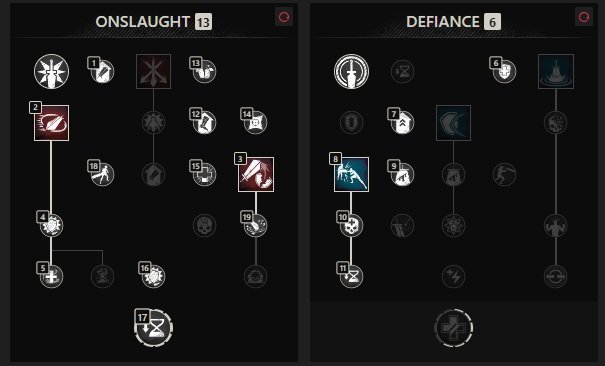
Your Greatsword is your primary instrument of destruction—the weapon you use to commit to a fight and secure kills. Its unique Stance System is the key to its power. Using an ability from the Onslaught tree puts you in Onslaught Stance, increasing your damage dealt and taken. Using a Defiance ability puts you in Defiant Stance, reducing damage dealt and taken.
- Relentless Rush: This is your premier gap-closing and engagement tool. It’s a damaging dash that applies a slow and, with the Adaptive Rush passive, can root targets in Onslaught Stance. The Relentless Power passive provides a crucial 10% Empower after hitting, boosting your follow-up attacks. Use this to initiate fights or to stick to fleeing targets.
- Skyward Slash: This ability is your primary Rend application tool, shredding enemy armor and making them vulnerable to your and your team’s damage.
- Steadfast Strike (Light) / Roaring Rupture (Medium): Your third slot defines your armor choice. Steadfast Strike is a fantastic dueling tool for Light armor users, offering a stagger, a pull, self-healing, and cooldown reduction. For Medium armor builds, Roaring Rupture is exceptional. It provides AoE damage, Weaken, Fortify, and with the Intimidating Roar passive, 10 seconds of crowd control immunity, allowing you to execute your combo uninterrupted.
 Relentless Rush: This is your premier gap-closing and engagement tool. It’s a damaging dash that applies a slow and, with the
 Adaptive Rush passive, can root targets in Onslaught Stance. The
 Relentless Power passive provides a crucial 10% Empower after hitting, boosting your follow-up attacks. Use this to initiate fights or to stick to fleeing targets.
 Skyward Slash: This ability is your primary Rend application tool, shredding enemy armor and making them vulnerable to your and your team’s damage.
 Steadfast Strike (Light) /
 Roaring Rupture (Medium): Your third slot defines your armor choice. Steadfast Strike is a fantastic dueling tool for Light armor users, offering a stagger, a pull, self-healing, and cooldown reduction. For Medium armor builds, Roaring Rupture is exceptional. It provides AoE damage, Weaken, Fortify, and with the
 Intimidating Roar passive, 10 seconds of crowd control immunity, allowing you to execute your combo uninterrupted.
Blunderbuss Mastery

Where the Greatsword is your commitment, the Blunderbuss is your flexible ranged option. It provides burst damage, crowd control, and utility, allowing you to pressure enemies from a distance or finish them off as they flee.
- Azoth Shrapnel Blast: This is your highest damaging ability and a core part of your burst combo. It fires a tight cluster of pellets that deal massive damage at close range while pushing yourself backwards.
- Net Shot: This is your primary crowd control and kiting tool. It fires a net that slows enemies significantly. The Exhaustive Net Shot perk is devastating, causing Exhaust, reducing the target’s Stamina regeneration, leaving them unable to dodge your follow-up Greatsword attacks.
- Claw Shot (Light) / Splitting Grenade (Medium): This flex slot defines your playstyle. Claw Shot is a phenomenal mobility tool for Light armor, pulling you to your target and rooting them, perfect for aggressive dives. In Medium armor, Splitting Grenade offers exceptional area denial and utility, especially with the Plagued Splitting Grenade perk.
 Net Shot: This is your primary crowd control and kiting tool. It fires a net that slows enemies significantly. The
 Claw Shot (Light) /
 Splitting Grenade (Medium): This flex slot defines your playstyle. Claw Shot is a phenomenal mobility tool for Light armor, pulling you to your target and rooting them, perfect for aggressive dives. In Medium armor,
The Blunderbuss‘s passive trees support both playstyles. The Containment tree enhances your mobility and single-target pressure, while the Chaos tree focuses on area damage and debuffs. For this build, you will typically take passives from Containment tree.
Gear, Perks, and Heartrune
Best-in-Slot Perks and Gear


Gear optimization is what separates a functional Reckoner from a legendary one. The right perks create powerful synergies that elevate your entire gameplay loop.
- Greatsword Perks: The legendary Greatsword for this build is the artifact
 Serenity. Its unique perk, Balanced Blade, grants you stacking Empower in Onslaught Stance and stacking Fortify in Defiant Stance, making you both harder to kill and more lethal the longer you fight.
- Blunderbuss Perks: Your Blunderbuss Artifact should be Pestilence. The must-have perk is Exhaustive Net Shot to enable your stamina-draining combos. Pair this with Arboreal Attunement for additional burst and Keenly Empowered for a damage boost after a critical hit.
- Armor Perks: Your armor is where you define your durability. Stack Refreshing and Elemental Aversion for cooldown reduction and protection from magical damage. Freedom is non-negotiable for PvP, with 3 stacks recommended to reduce crowd control duration. The Relentless Freedom perk is a game-changer, allowing Relentless Rush to cleanse roots and slows, and Increase Relentless Rush‘s critical hit chance.
 Balanced Blade, grants you stacking Empower in Onslaught Stance and stacking Fortify in Defiant Stance, making you both harder to kill and more lethal the longer you fight.
 Arboreal Attunement for additional burst and
 Keenly Empowered for a damage boost after a critical hit.
Set Perks Priority for PvP
| Perk Name | Effect | Priority | Recommended Slots |
|---|---|---|---|
 Elemental Aversion | Reduces elemental damage from magical weapons. | Highest | 4-5 pieces |
 Refreshing | Reduces all cooldowns. | Highest | 4-5 pieces |
 Freedom | Reduces crowd control duration. | High | 3 pieces |
Relentless Freedom | Relentless Rush removes roots and slows. | High | 1 piece |
 Health | Provides universal damage reduction. | High | Amulet |
Jewelry and Heartrune Perk Selection
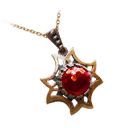
- Amulet: The ideal perks are Health, Stamina Recovery, and Slash Protection. The Champion’s Amulet from the PvP track is an excellent and accessible option. For an artifact, Ankh provides incredible sustain through its potion-boosting effects.
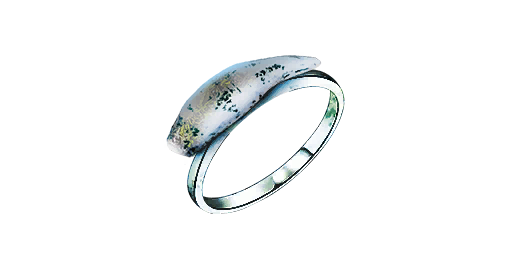
- Ring: Look for Slash Damage, Invigorated Punishment (increased damage against targets with an active buff).
- Earring: Doom’s Chance Earring from the Lazarus Instrumentality expedition is a fantastic goal, offering Refreshing Toast (faster potion cooldowns) and Regenerating (passive health regen) .
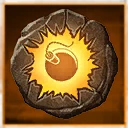
- Heartrune: The Brutal Heartrune of Detonate is your go-to for offensive plays. Prime it as you engage and detonate it during your Skyward Slash or when enemies are grouped by your Net Shot for a massive area-of-effect burst that can turn the tide of a teamfight.
 Stamina Recovery, and
 Slash Protection. The
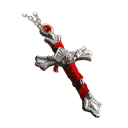 Ankh provides incredible sustain through its potion-boosting effects.
 Slash Damage,
 Invigorated Punishment (increased damage against targets with an active buff).
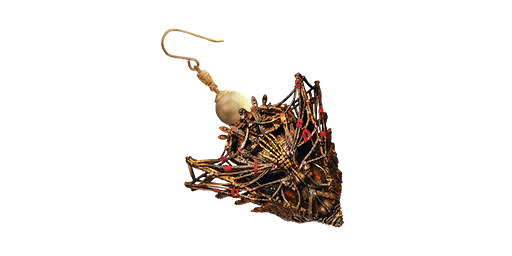 Doom’s Chance Earring from the Lazarus Instrumentality expedition is a fantastic goal, offering
 Regenerating (passive health regen)
The Perfect Engagement Sequence
- Opening Gambit: Position yourself at the flanks of the main fight. Use terrain to mask your approach. Identify your target—often a backline healer or a damaged melee player.
- Initial Lockdown: Open with your Blunderbuss. Use Net Shot to slow and potentially exhaust your target, limiting their escape options. Immediately follow up with Azoth Shrapnel Blast for a significant chunk of burst damage.
- The Committed Dive: Weapon swap to your Greatsword and use Relentless Rush to close the remaining distance, applying the root and gaining your Empower buff. Your target is now slowed, exhausted, and you are empowered.
- The Execution: Use Skyward Slash to apply Rend and Disease, shredding their armor and crippling their healing. Follow up with light attacks or a heavy attack to capitalize on the Rend. If they are still standing, Steadfast Strike will pull them back in and heal you, or your Roaring Rupture will make you unstoppable as you finish them.
- The Reset: If the fight turns against you or you secure the kill, use your Blunderbuss’s Claw Shot to escape to a new position or onto another target, or simply create distance and continue applying pressure with your ranged attacks.
Final Thoughts
The Greatsword and Blunderbuss Reckoner embodies the essence of adaptive aggression in New World‘s combat ecosystem. This build isn’t about mindless charging—it’s about applying intelligent pressure, controlling engagement ranges, and exploiting enemy weaknesses with a blend of physical and magical damage. By mastering the rotation sequences, understanding positioning nuances, and progressively optimizing your gear, you’ll become the pivot point of the battlefield, a force that can shift from a steadfast line-holder to a mobile skirmisher in the blink of an eye.
True mastery comes not from perfectly executing combinations on training dummies, but from reading the flow of battle and knowing when to be the unstoppable force and when to be the calculated barrage. The whistle of your Greatsword and the thunderous report of your Blunderbuss will become the soundtrack to your enemies’ defeat—a symphony of controlled chaos.