In the evolving meta of New World, the Rapier and Musket Build has endured as a PvP Powerhouse, particularly dominant in 1v1 skirmishes and Outpost Rush. The philosophy is one of beautiful contrasts: the Musket eliminates threats from distances where they cannot hope to retaliate, while the Rapier ensures that any foe who dares close that distance walks into a whirlwind of swift, precise death. You are the master of engagement range, dictating terms to your enemies through a combination of burst damage and evasive mobility. This isn’t merely a loadout; it’s an identity—the understanding that a single, well-placed shot can change the course of a battle, and that survival is the highest form of offense.
Attributes and Armor
Attribute Distribution

Your attribute spread is the mathematical soul of your build, representing the careful balance between overwhelming offense and essential survivability. Unlike the health-stacking bruisers of the frontline, the Duelist understands that avoiding damage through positioning and mobility is superior to merely absorbing it.
- Primary: 350 Dexterity – This is your non-negotiable foundation. Reaching the 350 Dexterity threshold grants a massive 20% critical chance bonus, transforming your attacks from nuisance-level to genuinely lethal.
- Secondary: 150 Intelligence – This investment is crucial for maximizing the damage of both weapons when using an elemental gem conversion.
- Tertiary: 100 Constitution – While some glass cannon variants exist, 100 Constitution provides the crucial health buffer that prevents you from being one-shot by unexpected abilities or lucky critical hits . The 20% increased healing effectiveness from consumables and 10% additional max health and defense at this threshold give you just enough staying power to recover from a mistake and reset the engagement.
Armor Weight
For the Rapier and Musket specialist, light armor is not a choice—it is a commandment. The 15% damage bonus is a powerful lure, but the extended dodge distance is what truly enables the hit-and-run playstyle that defines this build. While medium armor might seem tempting for its added survivability, the mobility penalty cripples your ability to maintain optimal positioning, and positioning is everything for this build.
The light armor dodge is not merely an escape tool; it is an integral part of your offensive rotation. The invulnerability frames (i-frames) allow you to evade telegraphed abilities while maintaining your damage uptime, seamlessly weaving between defense and offense. When combined with the Rapier’s inherent mobility tools like  Evade and
  Fleche, you become an elusive phantom that frustrates melee opponents and outmaneuvers other ranged specialists .
Weapon Masteries
Musket Mastery

Your Musket is your opening argument—the tool that allows you to influence battles from the shadows. It demands patience and precision, rewarding those who can lead their targets and predict enemy movement.
 Stopping Power – This ability is your premier interrupt and dueling tool. The instant shot after firing your Musket can stagger a target, disrupting enemy ability casts and creating a window for a quick follow-up shot to secure a kill. It’s perfect for stopping a charging bruiser in their tracks or interrupting a healer’s sacred ground.
- Powder Burn – More than just a damage-over-time effect, Powder Burn is your primary source of consistent pressure. The Crippling Powder Burn perk is a game-changer, applying a slow that makes it difficult for enemies to close the distance or escape your line of sight. Use this to control the pace of the engagement and set up your lethal combinations.
- Shooter’s Stance – For players who prefer a more static, turret-like playstyle, Shooter’s Stance offers immense burst potential.
 Stopping Power – This ability is your premier interrupt and dueling tool. The instant shot after firing your Musket can stagger a target, disrupting enemy ability casts and creating a window for a quick follow-up shot to secure a kill. It’s perfect for stopping a charging bruiser in their tracks or interrupting a healer’s sacred ground.
 Powder Burn – More than just a damage-over-time effect, Powder Burn is your primary source of consistent pressure. The
  Shooter’s Stance – For players who prefer a more static, turret-like playstyle, Shooter’s Stance offers immense burst potential.
Rapier Mastery

Where the Musket is your scalpel, the Rapier is your parrying dagger—the tool that ensures you survive when the fight closes to melee range. This weapon isn’t about trading blows; it’s about creating opportunities to reset the engagement to your preferred range.
- Riposte – This high-skill ability separates competent Rapier users from true masters. When timed correctly, it provides a moment of invulnerability and stuns the attacker, creating an opening to either unleash a counter-attack or create distance. The Sundering Riposte perk enhances this further by applying Rend to the struck target, making them more vulnerable to your follow-up Musket attacks.
- Fleche – Your primary mobility tool for both engagement and disengagement. This lunging attack carries you 10 meters through enemies, dealing damage as you go. the Refreshing Fleche perk can dramatically reduce its cooldown, providing near-constant mobility .
- Evade (with Omnidirectional Evade Perk) – This is arguably the cornerstone passive of the entire Rapier kit. It transforms your sidestep into a powerful offensive tool, providing a significant 12% damage boost for 2 seconds after use.
 Riposte – This high-skill ability separates competent Rapier users from true masters. When timed correctly, it provides a moment of invulnerability and stuns the attacker, creating an opening to either unleash a counter-attack or create distance. The
 Gear, Perks, and Heartrune
Best-in-Slot Gear and Critical Perks
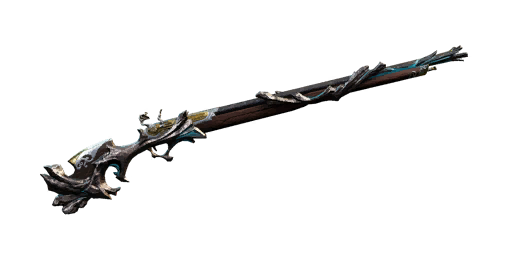
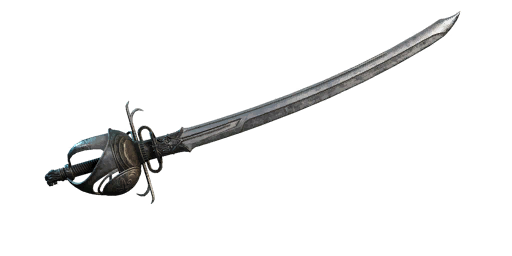
Gear optimization is what transforms this build from functional to truly legendary. Each piece should be carefully selected to enhance your specific playstyle, with particular attention to the perks that enable your core gameplay loop.
- Musket Perks: The legendary combination includes Enchanted for consistent basic attack damage, Vicious for enhanced critical damage.
- Rapier Perks: Prioritize Omnidirectional Evade Perk (the cornerstone of your damage rotation), followed by Keenly Jagged to enable bleed-based synergies, and Vicious for additional critical damage. The
 Finisher artifact Rapier provides exceptional burst potential for those willing to sacrifice some defensive utility for pure killing power.
 - Armor Perks: Your armor should stack Freedom (3 stacks recommended to reduce crowd control duration), Elemental Aversion (for protection against magical damage sources), and Resilient (to mitigate critical damage). For the Rapier and Musket specialist, Shirking Heals is an incredible source of self-healing that can turn the tide of a duel.
 Enchanted for consistent basic attack damage,
  Vicious for enhanced critical damage.
 Keenly Jagged to enable bleed-based synergies, and
 Set Perks Priority for PvP
| Perk Name | Effect | Priority | Recommended Slots |
|---|---|---|---|
 Elemental Aversion | Reduces elemental damage from magical weapons. | Highest | 3-4 pieces |
 Resilient | Reduces critical damage taken. | Highest | 4-5 pieces |
 Freedom | Reduces crowd control duration. | High | 3 pieces |
 Shirking Heals | Provides healing when dodging an attack. | High | 1-2 pieces |
 Refreshing | Reduces all cooldowns. | Medium | Any |
Jewelry and Heartrune Selection

- Amulet: Health, Divine, and Stamina Recovery create the ideal defensive combination. The Stamina Recovery in particular can be life-saving when multiple opponents focus you, providing that crucial extra dodge to escape certain death. Thrust Protection is a strong alternative for dueling other Dexterity users.
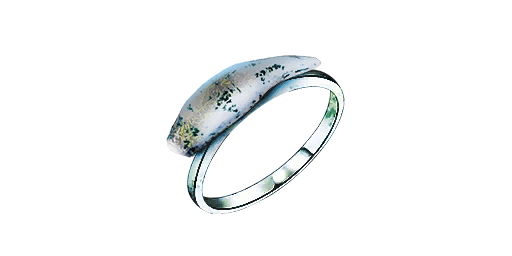
- Ring: Smooth Bone Ring or equivalent with Keen Awareness, and Leeching provides excellent damage output and sustainability.
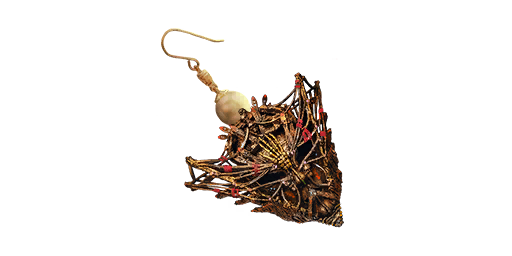
- Earring: Doom’s Chance Earring or similar with Refreshing Toast and Regenerating provides the essential utility that keeps you in fights longer by reducing potion cooldowns and providing passive healing.
- Heartrune: The Stoneform variants remain the premier choice for this build, particularly in PvP. The ability to break out of crowd control effects and remove debuffs is invaluable for a build that relies on positioning and mobility. The Cunning Heartrune of Stoneform provides two defensive buffs to reduce incoming damage, while the Stalwart Heartrune of Stoneform offers one defensive buff plus significant healing over time.
 Divine, and
  Stamina Recovery create the ideal defensive combination. The Stamina Recovery in particular can be life-saving when multiple opponents focus you, providing that crucial extra dodge to escape certain death.
  Thrust Protection is a strong alternative for dueling other Dexterity users.
 Keen Awareness, and
  Regenerating provides the essential utility that keeps you in fights longer by reducing potion cooldowns and providing passive healing.
The Perfect Engagement Sequence
Mastering the Rapier and Musket requires understanding the cadence of combat—when to apply pressure, when to reset, and how to transition seamlessly between your two weapons. A perfectly executed engagement unfolds with a distinct tempo:
- Opening Setup: Position yourself at the edge of the conflict with elevation or cover whenever possible. Identify your priority targets—typically healers, glass cannon mages, or other ranged damage dealers. Watch for enemies who have recently used their dodges or escape abilities, as they become vulnerable to your burst combination.
- Initial Engagement: Open with a headshot from your Musket, immediately followed by Powder Burn to apply both the damage-over-time and slow effect. This initial burst forces your opponent to react, often causing them to burn a defensive cooldown or dodge prematurely.
- Pressure Application: If the target is a healer or ranged opponent, continue applying Musket pressure with aimed shots. If a melee opponent closes the distance, weapon swap to your Rapier just before they reach you.
- Defensive Transition: As the melee enemy engages, use Riposte to stun them if they use a predictable ability, or Fleche to pass through them and create immediate distance. Follow up with a light attack combo enhanced by Evade and its damage bonus.
- Reset and Execute: Use Fleche to create significant distance, immediately swapping back to your Musket during the animation. The weapon swap cancel allows you to begin charging another shot as you create distance, turning your retreat into a new offensive opportunity. Finish wounded targets with a final Musket shot or Rapier flourish.
Final Thoughts
The Rapier and Musket specialist embodies the essence of precision warfare in New World’s combat ecosystem. This build isn’t about overwhelming force—it’s about applying exactly the right amount of pressure at exactly the right place and time. By mastering the rotation sequences, understanding positioning nuances, and progressively optimizing your gear, you’ll become the unseen arbiter of battlefields, determining engagements before your opponents even realize they’ve begun.