
The Knight in Trove is a classic Tank. While often seen as a Starter Class, it scales very well into the late game, especially for Delves and Tanking, thanks to its high survivability and crowd control. This guide gives you everything you need for the Knight, clear build templates (Tank / DPS / Speed-Farm), gem & emblem choices, stat priorities, rotation tips, and progression.
The Knight Abilities & passive
| Ability Name | Type | Description and Effect |
|---|---|---|
 Basic Attack | Attack | The Knight swings their sword in an arc, hitting multiple targets in front of them. This attack also applies a debuff that reduces the target’s outgoing damage by up to 10%. |
 Retribution (Passive) | Passive | Every time the Knight takes damage, they store up “Retribution” which increases the damage of their next attack (up to 3 stacks). This encourages the tank to actively take hits to maximize damage output. |
 Smash | Attack/CC | The Knight smashes the ground in a cone in front of them, dealing damage and knocking enemies back. This can also be used to destroy blocks and briefly taunt enemies. |
 Charge | Mobility/CC | The Knight lunges forward in a fiery ball, damaging and stunning enemies in their path. Hitting a wall stops the lunge. This ability can be used for engagement or quick repositioning. |
 Iron Will | Ultimate | This ability fully heals the Knight and grants them a shield that significantly reduces incoming damage by 50% for 12s. It also redirects a portion of incoming damage from nearby allies to the Knight. |
 Spirit Squire (Class Gem) | Rework | The Class Gem replaces the original Charge ability. Instead of lunging forward, the Knight sends a spectral squire forward through multiple enemies. This squire damages and stuns enemies in an area, providing excellent crowd control and making it a popular choice for speed farming. |
The Tank Build
Playstyle: Stand in the mess, taunt mobs with Smash / Charge (or Spirit Squire), use Iron Will to soak lethal damage and protect teammates. Your job is to hold enemy attention and keep the team alive.
Stat Priorities
| Priority | Stat Name | Build Purpose |
|---|---|---|
| 1 | Maximum Health (HP) | Scales Knight’s passive %HP bonus and ultimate heal. |
| 2 | % Maximum Health | Multiplies total health pool for maximum survivability. |
| 3 | Health Regeneration | Provides sustain between ultimate ability cooldowns. |
| 4 | Attack Speed | Increases basic attack rate to quickly trigger life leech. |
| 5 | Energy Regeneration | Allows continuous use of standard shield/dash abilities. |
Emblems, Allies & Flask
 Flask: Death-Defying Vial (keeps you alive and aligns perfectly with tanking).
- Emblems: Martial (physical) + Vampiric for life stealing.
- Allies: Earnie or
 Animated Jug for Light and survivability boosts; Rapt Berserker if you need damage bump while still tanking.
 Vampiric for life stealing.
 Earnie or
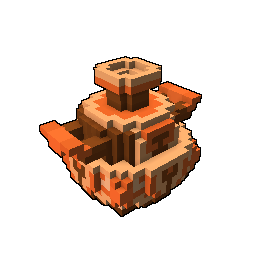 Animated Jug for Light and survivability boosts;
Rotation
- Initiate with Charge to stun priority enemies, follow with Smash to knock enemies back; use Iron Will reactively when your team is about to get crushed.
- Let the Retribution passive stack if you can; it makes your next hits sting after being hit.
DPS Knight Build
Playstyle: Trade some durability for big physical damage: burst with Retribution procs, leverage attack speed and crit to melt groups and bosses.
Stat Priorities
The stat priorities for a DPS Knight build focus entirely on maximizing physical burst damage and attack velocity, as outlined in the table below.
| Priority | Stat | Build Purpose |
|---|---|---|
| 1 | Light | Essential endgame stat to bypass boss armor in Delves and Geode. |
| 2 | Physical Damage | The core scaling stat for the Knight’s hard-hitting basic attacks. |
| 3 | Critical Damage | Multiplies total damage output exponentially when scoring critical hits. |
| 4 | Critical Hit | Upgraded until you reach a 100% critical strike chance. |
| 5 | Attack Speed | Maximizes basic attack rate to abuse the Knight’s fast damage animations. |
| 6 | Movement Speed | Swapped in place of secondary stats for faster dungeon speed farming. |
Emblems, Allies & Flask
- Emblems:
 Martial (damage) + Chronomantic Emblem (Reduces ability cooldowns) this is a common DPS emblem pairing.
- Flasks: can still be Death-Defying Vial if soloing risky content, otherwise pick a damage-boosting flask if you have healer support.
- Allies:
 Jingles for reduce cooldown or Earnie for protective shield.
 Chronomantic Emblem (Reduces ability cooldowns) this is a common DPS emblem pairing.
 Jingles for reduce cooldown or
Rotation
- Let Retribution stacks build (it stacks when you take hits), don’t waste the big proc on low-value swings. Use Smash to apply debuff and cleave; weave in basic attacks (which scale with Physical Damage + Attack Speed) to maximize DPS uptime.
Speed Farming Knight Build
Playstyle: Move fast, hit hard enough to clear packs, and avoid long cooldown interactions. Focus on movement speed and attack speed combos to clear content quickly.
Stat Priorities
The stat priorities for a Speed Farming Knight build pivot heavily toward mobility and clear speed, altering gear stats compared to standard DPS builds.
| Priority | Stat Name | Build Purpose |
|---|---|---|
| 1 | Movement Speed | Rolled as a primary focus on your Hat, Sword, and Face to fix Knight’s slow pacing. |
| 2 | Light | Crucial to instantly melt boss shielding when speed running World Bosses or high-tier Ubers. |
| 3 | Physical Damage | Provides the essential baseline flat damage necessary to one-shot standard dungeon mobs. |
| 4 | Attack Speed | Synergizes with Knight’s fast default basic attack animation to burst down standard dungeon chests. |
| 5 | Critical Damage | Scales up your heavy burst numbers alongside your Martial Emblem flask triggers. |
| 6 | Magic Find | Rolled on secondary gear slots to optimize loot drops while burning through portals. |
| 7 | Critical Hit | Maintained minimally up to a 100% threshold to ensure reliable speed clear damage. |
Emblems, Allies & Flask
Emblems:  Berserker (boosts Attack Speed and Movement Speed) +
 Martial (Increases your Physical Damage by 250%).
Flask:  Death-Defying Vial (if you want to be reckless) or
 Vampiric Vial for sustain.
Ally:  Rapt Berserker
Rotation
- Charge to close gaps, Smash to control clumps, then kite to the next pack. If you’re running with a team, coordinate to prevent unnecessary pulls.
- Consider subclass choices (see below) that grant mount or buff benefits for speed clearing.
Subclass, Class Gems

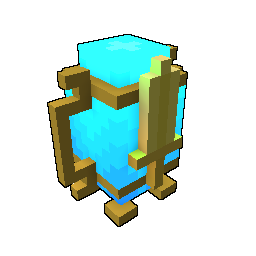
The Subclass system lets you slot another class’s passive/ability to change your playstyle — pick one that complements your chosen role (e.g., a subclass with movement buffs or extra sustain for speed/tank builds). Class Gems further modify a specific ability (Knight’s Class Gem converts Charge into Spirit Squire, changing the behavior into a charging squire that stuns and hits differently). If you want to swap Charge for a more DPS-heavy option, equip the Knight Class Gem.
Practical Subclass picks:
- Bard subclass: Great for DPS and Speed Farm builds it increases Attack Speed, Crit Damage, Move Speed, and Life leech.
- Vanguardian: Pairs well with Tank build for hybrid survivability.
Final Thoughts
The Knight Class offers diverse and satisfying gameplay options, making it a staple for both solo and group engagements. It’s essential to adapt your strategy based on your team’s composition and the content you’re tackling. Be sure to utilize the right Emblems and Allies to enhance your build further. As you progress through early to endgame content, tailoring your Gear and Stats to fit your chosen role will be key to maximizing your performance.